Planar View
|
1238888 |
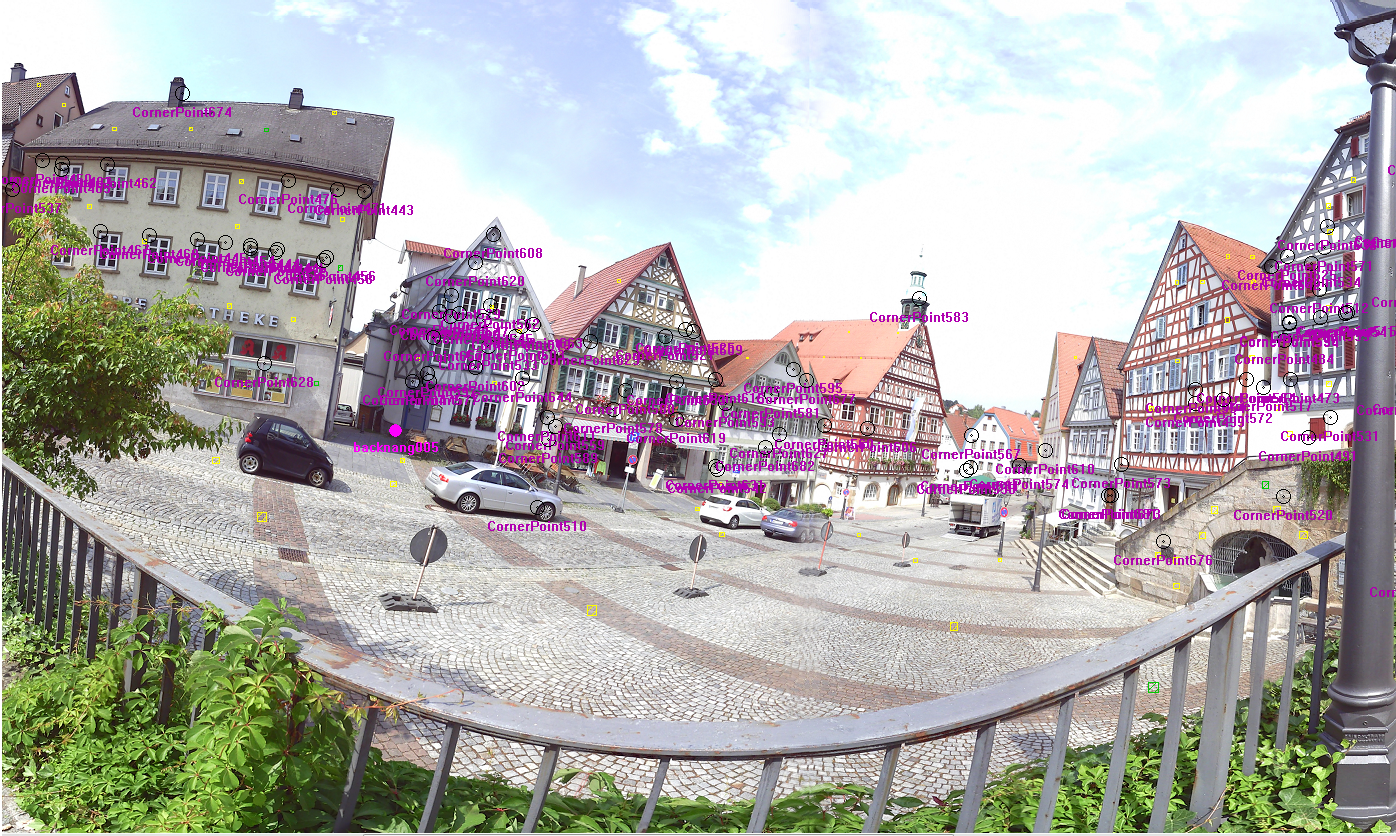
Figure 10-4 Planar view
Like the quick view , the planar view displays the content of a single scan only.
To start the planar view right-click the scan’s name in the structure view, then click View > Planar View in the context menu.
At first glance, the planar view may appear very strange because the scanned area seems to be distorted. Connections between objects in the picture do not run in a straight line but are curved.
The consequence of the distortion is that it only succeeds approximately in displaying other objects congruent with the scan points. If a scanned reference sphere already appears in the view more like an ellipsoid than a sphere, do not be surprised that the added reference object does not cover the reference sphere completely. For this reason no CAD models are displayed in the planar view; use the 3D view for this instead.
The planar view is useful because of the fact that with some scanners, it is the most natural display format of the scan points. A lot of scanners process the horizontal and vertical angles step by step; it is therefore practical to display the scan points in a column and row oriented manner accordingly.
The view starts at the left margin with the first column the scanner recorded. In the local coordinate system of the scanner, this column normally has the horizontal angle of 0°. The subsequent columns then come to the right, with an increasing horizontal angle until 360° is reached with a circumferential scan. In the top row, the scan points with the greatest vertical angle reached are displayed, for example, the zenith with +90°, which is directly over the scanner. From top to bottom, the vertical angle decreases, reaching 0° at the horizontal line and then becoming a negative value. The smallest possible vertical angle is –90°.
As in the quick view, you always view the scanned area from the scanner position – you cannot leave this position. However, you can of course change your line of sight and scale.
As in all views, you can set the scale using the scroll wheel of your mouse. There are also further buttons in the toolbar for the planar view which you can use to change the scale.

