The Process
Follow the process below to use the Quality Manager.
1. In SCENE, begin with an empty, saved project containing only the raw scans and external references.
2. Pre-process the scans and let SCENE register the project.
3. Open Quality Manager and sort the scan list according to number of references, see Figure 2-2.
4. Open in SCENE any scan with fewer than 3 references.
| • | Do this from Quality Manager: Right-click the scan in the scan list and select Open in SCENE) and add targets manually until at least 3 are available and matchable. |
| • | If all scans have at least 3 references, jump to step 5. |
At times there may not be 3 references available in the scan. In that case, 2 references may be enough.
5. Update the project top level ScanManager and confirm in Quality Manager that each scan has at least 3 matched references. Errors aren't a concern at this point.
6. Right-click the top scans folder in Quality Manager and select Find Missing Targets. The dialog opens as in Figure 2-2 below. Typically, nothing needs to be adjusted in this dialog box, but ensure the sphere sizes are active in the project. In rare cases, the values can be adjusted:
| • | The search range might be decreased if finding spheres past a certain range is not required. |
Any spheres found by SCENE outside the search range will be kept if they are good enough for Quality Manager to keep.
| • | Ideally, always keep the checkbox filled to remove bad spheres, or a lot of badly fitted spheres will remain. |
| • | If no checkerboards or spheres are used during scanning, turn off fitting of checkerboards and spheres. |
| • | The checkerboard width should be set correctly if using checkerboards, however the default value should be correct for most checkerboards. |
7. Let Quality Manager process the project. This will take some time but requires no interaction.
8. Once Quality Manager is finished it will automatically update the ScanManager and relate how many bad spheres were removed and how many good spheres and checkerboards were added.
9. Go to the Warnings & Fixes tab in Quality Manager, (see Warnings & Fixes tab in Chapter 3).
10. Go through any warnings or errors and try to fix them. The description for each should give an indication of what can be done to mitigate it. Often, it’s also possible to double-click them to jump directly to the problem.
11. [Optional] Right-click the top scans folder in Quality Manager and select Disable Unnecessary Inclinometers. This makes Quality Manager disable the inclinometer in scans it deems safe to do so.
If there are no external references in a project, this function should not be used as it might turn off all inclinometers leaving the cluster unlevelled.
12. If the scans were scanned with a good target distribution everything should now be green. If this is not the case:
| • | If the scans folder itself is yellow or red, go to the Cluster Info tab in Quality Manager to see what is wrong, see the Cluster Info tab topic in Chapter 3; |
| • | If there are problems here, they can rarely be fixed after the scanning is done; it is mostly a guide for those who scan to find out what they need to improve. |
| • | If there are a few scans with an AVERAGE distribution quality which can't be fixed, it's possible to manually force those to a GOOD quality for a better looking report, see Force Acceptable Distribution Quality in the Reference Angle Distribution topic in Chapter 3; |
| • | Go to Tools > Delete all stray targets in Quality Manager to remove possible mismatched references and clean up the project. |
13. Go to File > Save As > PDF Report… in Quality Manager to save a report of the result. This completes the process.
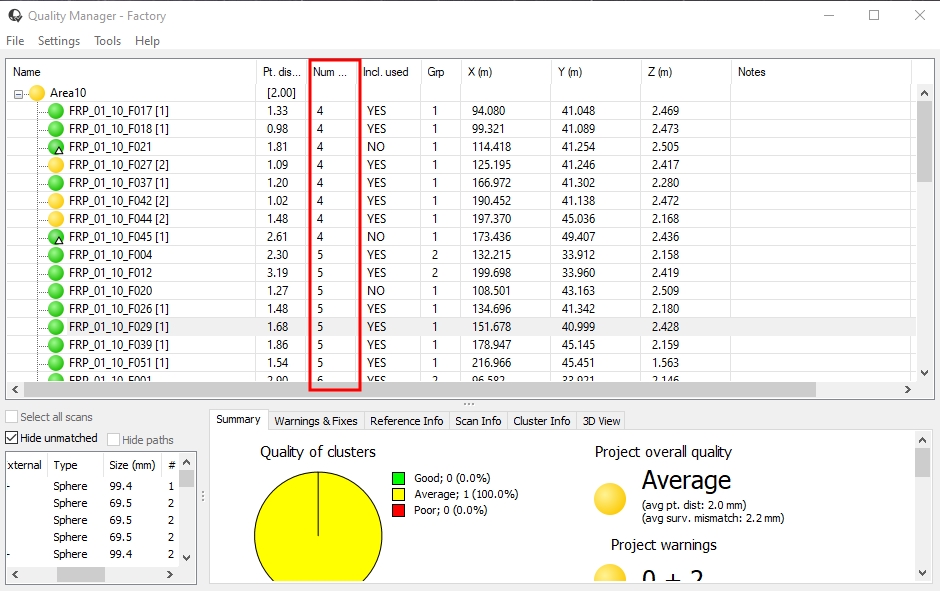
Figure 2-2 : Sort scans to have the scans with lowest number of references on top.
