 Import EDR Data
An Event Data Recorder (EDR), also known as a vehicle "black box" provides solid data points that you can import into FARO Zone 3D. You can use the data points to help determine vehicle details near the time of the crash.
Following a vehicle incident, crash reconstruction experts use a Crash Data Retrieval CDR tool to retrieve data from a vehicle's black box. (Most vehicles 2016 and newer are equipped with this technology.)
Some EDR systems monitor the vehicle’s speed along its length, but not sideways momentum. Crash analysts create a complete view of an accident by examining momentum, energy, and crush damage, and comparing their speed estimates to the numbers reported by the EDR.
EDR can be used in litigation for traffic-related incidents, but the primary purpose of an EDR is to improve driver safety. Please consider the limitations of EDR data in traffic incident reconstruction and determining the cause of traffic events.
To import EDR data:
-
Select a vehicle, or place a vehicle in the drawing.
-
From the Animation ribbon, select the Import Animation Data dropdown arrow, and choose EDR.
-
Import the data from the EDR PDF in one of the following ways:
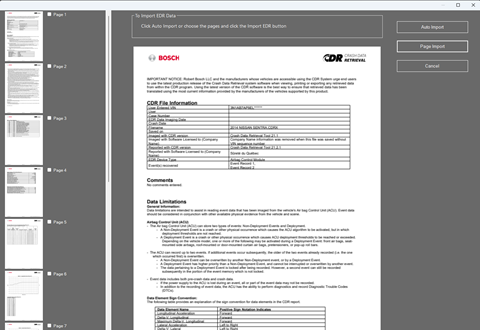
Automatically import the data Click PDF Import, select a PDF file, and then click Auto Import. The tool generates the Pre-Crash data and Crash Pulse Data from the PDF document. If your crash report contains shorter time intervals, you can select select from a Standard or Highest interval setting. Use Standard for basic motion (recommended for most scenarios), and use Highest for impact analysis and accuracy.
Open an existing EDR file If an EDR data file exists for the vehicle, click Open, navigate to the file, and then open it by double-clicking it. The fields in the EDRImport dialog box update to reflect data from the file. If you used an EDR data file, skip to Step 7.
Manually enter the data If you are unable to automatically import the data from the report PDF, open the crash report (PDF or CSV) and enter the EDR data manually. You can also export the report into a spreadsheet format from which you can paste the column data into FARO Zone 3D. Following are examples of CDR tool Pre-Crash PDF and CSV data tables.

-
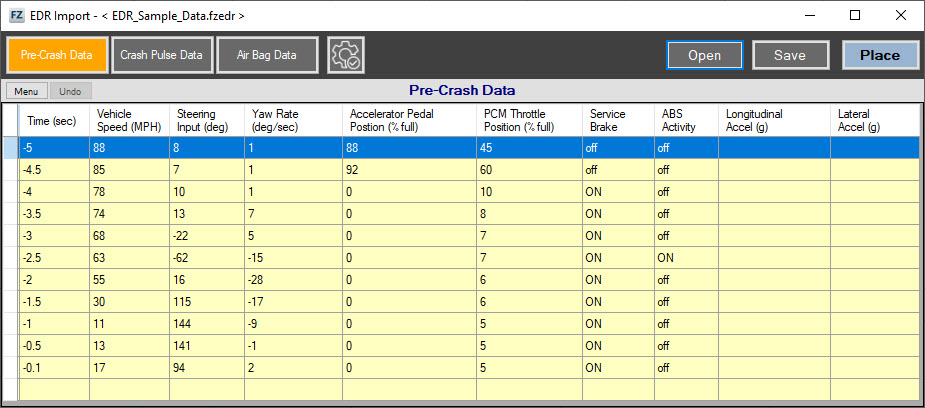
Use one of the above methods to enter the Pre-Crash data (required) and Crash Pulse Data (if it is available). If you are only entering pre-crash data, open the EDR options and select Pre-Crash Animation Only.
Pre-Crash options are as follows: -
-
Time (sec)
-
Vehicle Speed (MPH)
-
Steering Input (degree)
-
Yaw Rate (deg/sec)
-
Accelerator Pedal Position(%)
-
PCM Throttle Position (%)
-
Service Brake (On/Off)
-
ABS Activity (On/Off)
-
Longitudinal Accel (g)
-
Lateral Accel (g)
-
-
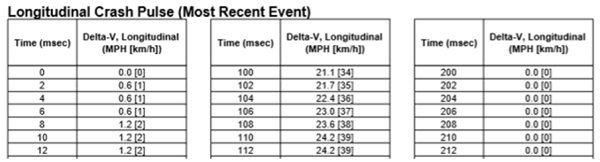
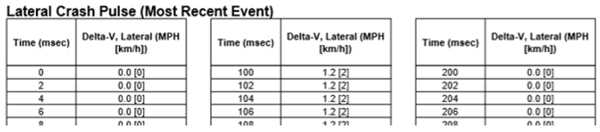
Enter the Crash Pulse data, if it is available.
-
Time (ms)
-
Longitudinal Delta-V (MPH)
-
Lateral Delta-V (MPH)
-
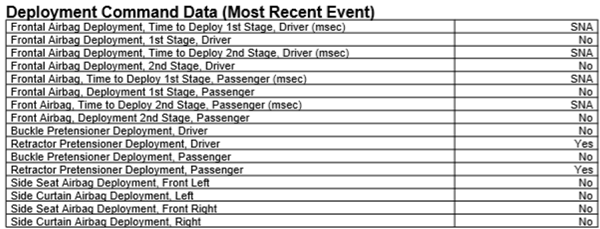
Air Bag Deployment Data: Optional, but if you enter values, the EDR Dashboard shows when the air bags deployed.
-
-
Click
 EDR Options to configure additional options.
|
Select this option if you only need pre-crash animation. When this option is selected, you do not need to include information in Crash Pulse Data. Newer vehicles record pre-crash data at 0.1 sec intervals, while older vehicles record pre-crash data at 0.5 sec intervals. Smaller intervals more accurately recreate the animation path, but the extensive number of values clutters the view. All of the values makes it difficult to visualize the path, and perform time-distance analysis. Use Show KEP every x to change the value to a more manageable number of event points.
|
|
|
Clockwise Steering with Positive Input |
Most vehicles have counter-clockwise steering with positive input. Select this option if you are configuring data for a vehicle that has clockwise steering. |
|
Select one of the following options from the dropdown:
|

-
(Optional) Click Save to save the EDR data file for later use. The file is saved with the extension .fzedr.
-
Click Place to create the EDR animation path. The EDR Import dialog box closes
-
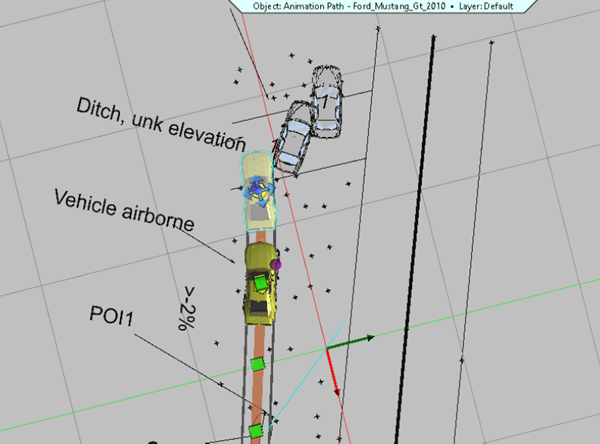
Place the anchor of the animation path at the crash point, rotate the animation path to match the evidence mark.
-
Run the animation to review the action. View the data in the Dashboard HUD display.
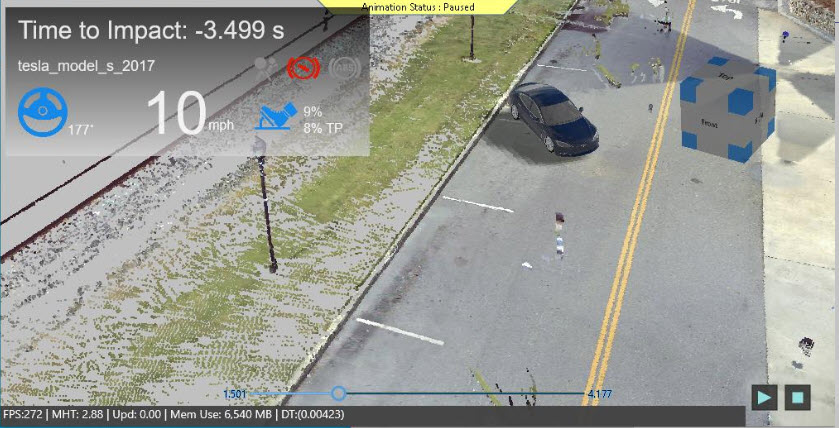
You can display up to two EDR dashboards. Each EDR contains different data, so dashboards display the data provided.

Reposition an EDR dashboard to another corner of the screen by hovering over a corner, and clicking and dragging the dashboard to the corner.
