 Point Cloud Register
Use the Point Cloud Auto-Registration tool to create a point cloud from a single scan, or a registered point cloud from a group (two or more) scans. When you import two or more scans, the scans register automatically.
In order to automatically register multiple scans, the scans must contain the following:
-
Overlapping datapoints
-
Natural or artificial targets
If the software cannot automatically register the scans, you are prompted to complete the registration process using the Visual-Registration workflow.
Scan processing and registration are only supported with FARO Zone 3D Expert Plus software.
Use this tool to bypass FARO SCENE and register a point cloud from the raw data (.fls) files.
To register a point cloud:
-
From the Point Cloud ribbon, click
Point Cloud Registration. This opens the Point Cloud One Step Registration dialog.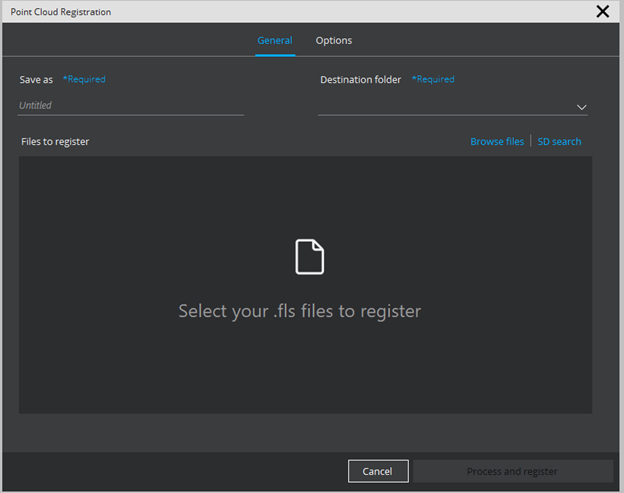
-
Select the scan data in one of the following ways:
-
Name the project in the Save as field.
-
Select a destination folder for the registration project. The destination folder must be empty.
-
After you complete adding data for the project, a time estimate displays. The time required depends on your computer's hardware, the number of scans to process, resolution, and other settings.
-
Configure the registration options. See Point Cloud Registration Options. Try using the default settings first. Modify the settings if the registration operation fails, or if you have experience with the options and you understand how the various options interact.
-
Click Process and register. The message field in the lower left of the window displays the progress of the registration. When the operation completes, the point cloud loads.
If the automatic registration fails, you are prompted to perform a visual registration.
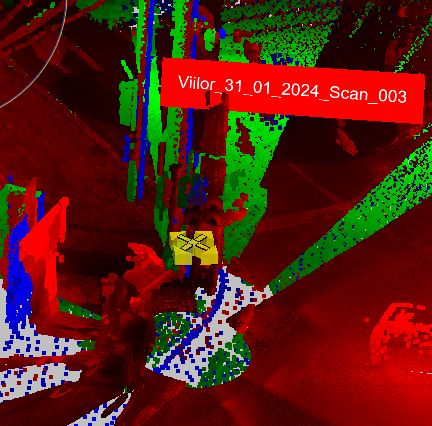
Select Yes at the prompt to proceed performing visual registration. The scan point data loads and displays the color-coded scans and the scans are listed in the 3D View Window.
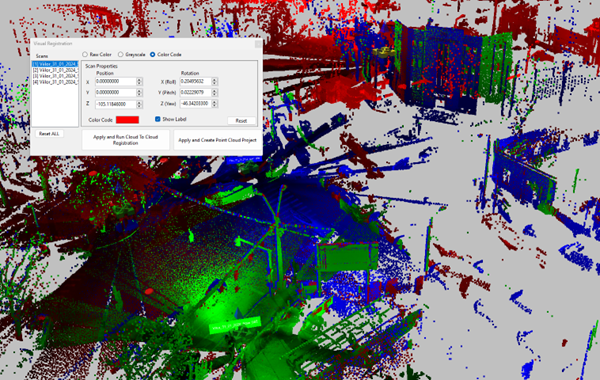
Use the grips to position the scans. The move grip highlights in yellow on the selected scan.
After you position the scan, select one of the following options:
Apply and Run Cloud To Cloud Registration - Re-run the automatic cloud-to-cloud registration with the scans that you re-positioned. If this registration fails, you can make more adjustments and try again. Upon successful registration, the generated point cloud loads.
Apply and Create Point Cloud Project - Create the point cloud from the current scan positions.
8. Save the project.
- If you have SD card that contains raw scan data in FLS folders, select SD search. From the search results window, select the project to include, and then click Add Selected.
- To browse for scan data, click Browse files. Navigate to the folder that contains the .FLS files, select the files and click Open. After you select the scans, click the trashcan icon to delete any unwanted scans.
Point Cloud Registration Options
| Force Process | Use a filter to identify inaccurate scan points by comparing the scan point with the scan points in the surrounding area. Filtering is performed based on information obtained from the point. Use filters to determine the surrounding area. |
| Colorize|Laser HDR Colorize | Colorize the scan using the camera pictures. |
| Dark Point Filter |
The Dark Point Filter is a good multi-purpose filter that removes points based on the Reflectance Threshold value. Reflectance Threshold indicates the minimum reflectance value a scan point must have. The range is: 0 to 2048. A dark scan point results from minimal light entering the scanner. This condition produces an increase in noise. This filter is not applicable on colorized scan points. |
| Edge Artifact Filter |
This filter removes artifacts at the edges of objects. This is a powerful filter recommended for cleaning up interior rooms. This filter removes objects that you may want to retain in the scan, such as trajectory rods, wires, and cords. |
| Stray Filter |
The Stray Filter should typically be enabled, as it helps to correct scan data. The Stray Filter ensures that the 2D grid cell of a scan point contains a sufficient percentage of points with a distance similar to the scan point. Stray Filter Grid Size - The size of the surrounding area used for comparison. The filter counts valid scan points of the surrounding area that are at a distance to the scanner which is approximately the same as the distance of the scan point that is in view. Distance Threshold: Count scan points with distances less than this threshold. Allocation: Include the scan points within the surrounding area to the distance threshold. An Allocation threshold set to below 50% is recommended; however, do not apply the filter on surfaces that were inclined from the scanner’s laser. This filter applies to the whole scan and cannot be limited to selected areas. |
| Distance Filter |
Remove all scan points which are outside of a certain distance range. This filter is recommended for outside scans. All points with a distance less than the minimum specified distance are deleted, as well as all points that exceed the maximum distance. Leaving the minimum distance at the default is recommended. |
| Sphere Detection |
Search for a sphere target type during processing. Use the Active Radius setting to identify the minimum size of the spheres to detect. |
| Checker Board Detection | Search for a checkerboard target type during processing. |
| Plane Detection | Search for plane during processing. |
| Marker Detection | Detect markers in the scan. |
