 Point Cloud Markers
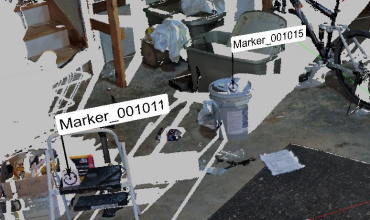
You can detect and label scanned point cloud markers in FARO SCENE. The FARO SCENE project file (.lsproj) contains the position and description data for the markers.
These RAD (Ringed Automatically Detected) markers are a type of artificial target that can be used for scan registration. Each marker is unique, so that when an identical marker is found in two scans, the software pinpoints the center points of the markers in both scans. Following are examples of markers:

To find a point cloud marker, open the lsproj file in FARO Zone 3D . Click on the Point Cloud Marker tool to capture the data and place the arrow label at the center of each target.
Adding Coded Point Cloud Markers in FARO SCENE
From FARO SCENE, in planar view of a scan, click the Mark Points dropdown and select Mark Marker.
Targets that are directly perpendicular to the scanner (such as hotspots on perpendicular walls) can appear washed out in greyscale. To remedy this, angle the targets a few degrees from perpendicular to the scanner.
You can print the markers at a reduced size to cover less of the scanned area, but this changes the maximum distance at which the markers can be detected. The following table shows the distances at which markers can be detected depending on scan resolution and marker size. The markers must be placed orthogonally (at right angles) to the scanning direction to reach these limits.
| Scan Resolution |
Marker size 100% 15.5 cm (6 in) |
Marker size 75% 11.7 cm (4.5 in) |
Marker size 50% 8 cm (3 in) |
|---|---|---|---|
| 1/8 | 3 m (9 ft, 10 in) | 3 m (9 ft, 10 in) | 3 m (8 ft, 2 in) |
| 1/4 | 6.5 m (19 ft, 8 in) | 5.2 m (17 ft) | 4.2 m (14 ft, 9 in) |
| 1/2 | 16 m (52 ft, 6 in) | 8.3 m (27 ft, 2 in) | 3 m (17 ft, 6 in) |
You can find printable targets here.
Rules for using markers
-
Marker IDs must be unique within a project. Ensure that you do not include two markers with the same ID in the scan area.
-
Only place markers on flat surfaces.
-
Do not move the markers until the scan project is finished. For markers used outdoors, weight down the corners of the markers. Ensure that the weights do not cover or cast a shadow on the pattern on the marker.
-
The pattern must be clearly visible.
-
Position the markers in an irregular pattern. Do not position them symmetrically.
-
Place the markers in various distances to the object, avoiding linear alignment.
-
Ideally, a marker should be captured at least twice in each scan.
