 Blood Spatter
To perform blood spatter analysis, you can import an image of the blood spatter pattern from the scene and scale it to a model created in FARO Zone 3D, or to a point cloud. Coordinates must be precise for models built in FARO Zone 3D.
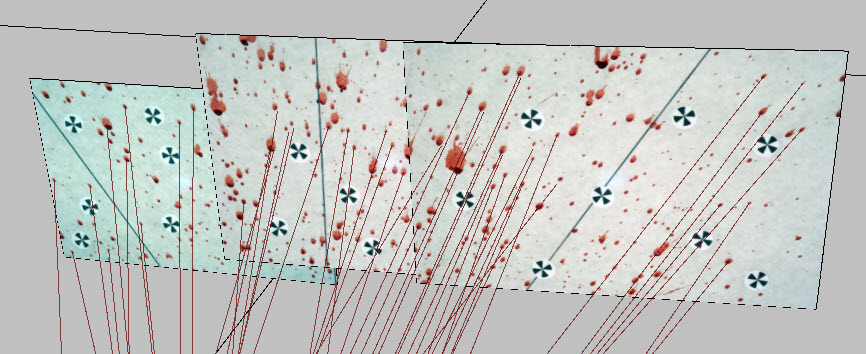
The point cloud should include registration targets (as shown below), which you can align to the targets in the photo. For a structure built with data points, align to the data points. Accurate alignment is necessary.
Aligning the Photo to the Surface
To import blood spatter photos and align them to the recreated surface:
-
Create a diagram from data points, or import a point cloud of the scene.
-
From the Power Tools ribbon, click the Blood Spatter tool.
-
Locate the blood spatter photo and open it.
-
Determine which common targets or data points to use for alignment.
-
Click the Alignment 2 or 3 command on the Blood Spatter Analysis tool panel. A window with the image opens.
-
Click the targets or data points, and zoom in for the best view and most accurate placement.
-
Click the points in the diagram. You may want to use the magnification window on the mini-bar to accurately select the points. After you select the points, the photo auto-scales and snaps to the points.
-
Examine the alignment. Use the arrow keys to nudge the image to the left or right. Use the Transparency setting to check the alignment.
-
Repeat steps 1-8 for additional images.
Blood Spatter Analysis Tool Panel
 Align 2 Point Align 2 Point
|
Align the image by selecting two points. The first two points should be nearly horizontal. |
 Align 3 Point Align 3 Point
|
Align the image by selecting three points. The first two points should be nearly horizontal, and the third point should be vertical. |
 Edit Droplets Edit Droplets
|
Open the Edit Droplets panel, which provides you with tools for recreating blood droplets in the drawing. |
 Settings Settings
|
Open the Settings panel. |
 Layer Layer
|
Open the Layer Manager. |
| Description | Type a description for the object. |
| X, Y, Z | Adjust the placement of the image along the axis. |
| Yaw | Adjust the vertical placement of the image. |
| Close in work | Enable for close editing of the object. |
| Transparency | Use the transparency setting to align points in the object with an image or point cloud. |
| Edit Droplets | Opens the Edit Droplets panel, which provides you with tools for recreating blood droplets in the drawing. |
| Settings | Configure default settings for the tool. |
Performing Blood Spatter Analysis
After aligning the image to the surface, follow the steps below to complete the blood spatter analysis.
-
Select the blood spatter image to open the Blood Spatter Analysis Tool panel.
-
Click the Blood Spatter command. The Edit Droplets tool panel displays:
-
Zoom into a droplet with the mouse wheel or the zoom controls at the top of the window.
-
Do one of the following:
-
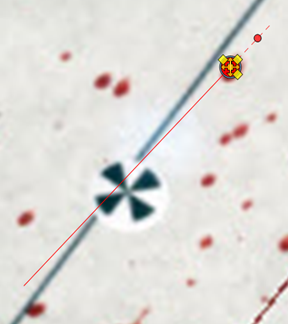
Click the Blood Spatter command and click the rounded end of the droplet. Click the opposite end of the droplet and click the thickest point of the droplet. Grips allow you to rotate and adjust size of the analysis ellipse. Accuracy of sizing is important!

OR
-
Click the Edge Detection command and move the shaded aperture over a droplet. Click to place the ellipse and trajectory line.
-
-
Zoom in for a better fit over the droplet. Change the aperture size by holding down the CTRL or Shift key and rolling the mouse wheel.
-
If the ellipse is placed successfully, but the trajectory line is in the wrong direction, click the Flip command or press the F key on the keyboard or right-click and select Flip Direction. You may also Edit Droplet or Undo.
-
Repeat the process for as many droplets as possible. For accurate results, sample from many areas rather than from just one spot.
-
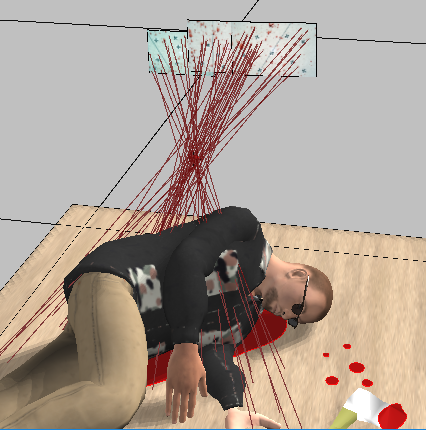
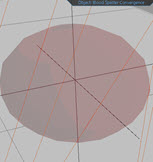
Close the Edit Droplet window. A top view of the Convergence Ellipsoid that encompasses all areas of convergence displays. Convergence Points indicate the individual points of convergence.
-
Close the Edit Droplet window. A top view of the Convergence Ellipsoid that encompasses all areas of convergence displays. Convergence Points indicate the individual points of convergence.
-
The analysis begins with one convergence. You can change the Convergence Group number in the tool panel to account for a moving shooter, or for more than one shooter.
-
Click the convergence sphere to open the tool panel. You can adjust the color and transparency of the Convergence Ellipsoid and Points. You can refine the analysis by opening the blood spatter image and adjusting the position or orientation of the image. Click Back to return to the tools panel.
-
Repeat the steps for additional blood spatter images. Calculations of convergence automatically include the additional images.
-
Click Report to open a report template with each droplet represented in the Print Preview window.
Edit Droplets Tool Panel
 Draw Droplet Draw Droplet
|
Manually draw a droplet with three clicks. The blood droplet appears with an extension so you can adjust it easily.
|
 Edge Detection Edge Detection
|
Automatically select droplets with a click. |
 Edit Droplet Edit Droplet
|
Opens the Droplet tool panel. |
 Flip Direction Flip Direction
|
Reverse the direction of the trajectory line. |
 Undo Undo
|
Undo the last action with each click. |
 Zoom All Zoom All
|
Zooms to the entire photo. |
 Zoom In Zoom In
|
Incrementally zooms in with each click. |
 Zoom Out Zoom Out
|
Incrementally zooms out with each click. |
 Scale Scale
|
Insert a scale bar for reference. |
 Show Point Numbers Show Point Numbers
|
Show available point numbers. |
 Contrast Contrast
|
Use the slider bar to adjust contrast between the image and blood spatter. |
