Diagnostics
|
1238888 |
The Diagnostics group controls is a set of commands for checking your
Base Deflection
Click Base Deflection to run a test the physical setup of your
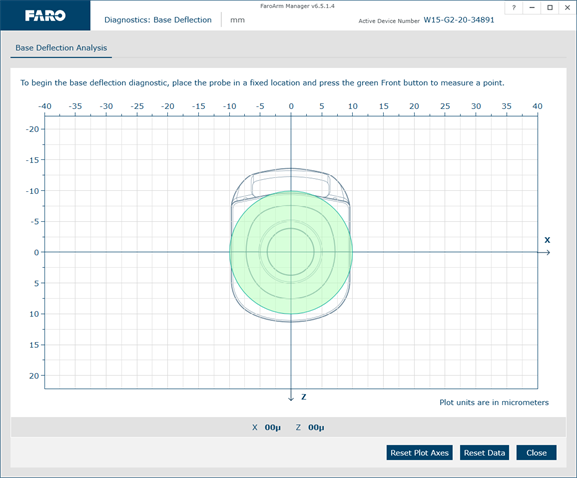
Base Deflection dialog box
-
Set up the FARO compensation cone approximately ⅔ of the
You can also use a 5 mm (0.2 in) machine drilled hole on your part. The hole does not have to be exactly 5 mm (0.2 in), but it must be smaller than the probe’s diameter and have a smooth seat.
-
Place a properly compensated probe firmly in the cone or hole.
-
Click Reset Data to begin the test.
-
Press the green Front button and apply up to 3 pounds-force (13 Newtons) to the base of the
Press the green Front button to reset the screen at any time.
-
Press the red Back button to stop.
-
Any deflection of the base is recorded and displayed on the screen. All of the points must be within the circle on the graph.
-
Rotate the mouse wheel to zoom in and out of the chart. Right-click and drag to move the chart around the window.
-
Click Reset Plot Axes or double-click the wheel button to reset the chart view.
-
-
Click Close to exit.
You should repeat this test and apply force to your part. Any movement in your part or the
Diagnostics
Click Diagnostics to see the operation if your
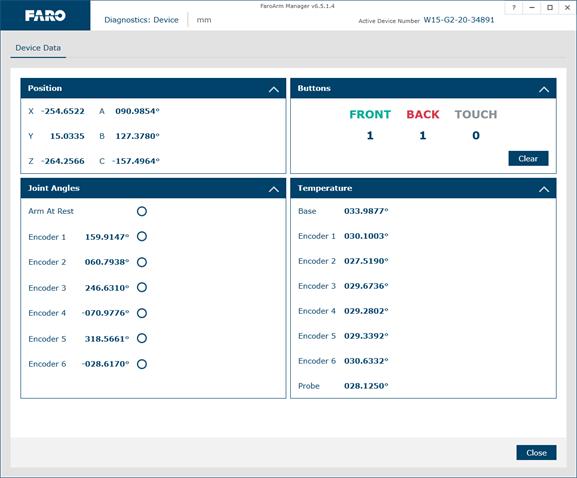
Diagnostics dialog box
-
Move the
-
Press the green Front and red Back buttons.
