Assign Tags to Scans and Waypoints
|
1238888 |
You can assign tags to scans and waypoints (360° photos, 2D photos and location markers).
If your capture has been made with the Orbis scanner, you can only assign tags to scans that also have a Flash scan. In this case, you can assign the tag to the mobile scan or the Flash scan. If you have a mobile scan without Flash scan, you cannot assign any tags.
You can assign tags:
-
Via the icon above the project structure view. This option opens the Tags Management page. On this page, you can easily assign tags to a large number of scans and photos
-
Via the context menu in the project structure view and the Viewer. With this option, you can add tags to one or more scans or waypoints.
-
Via the time travel dropdown in the Viewer. With this option, you can assign tags to a single 360° photo or to all 360° at one time point.
Assign Tags on the Tags Management Page
-
Click the
 icon above the project structure view.
 -
Select the Assign tags to scans and 360° photos entry.
With this entry, you can also assign tags to 2D photos and location markers.
In the tree view on the left side, objects that support tags are displayed. These objects are also displayed in the Viewer on the right side.
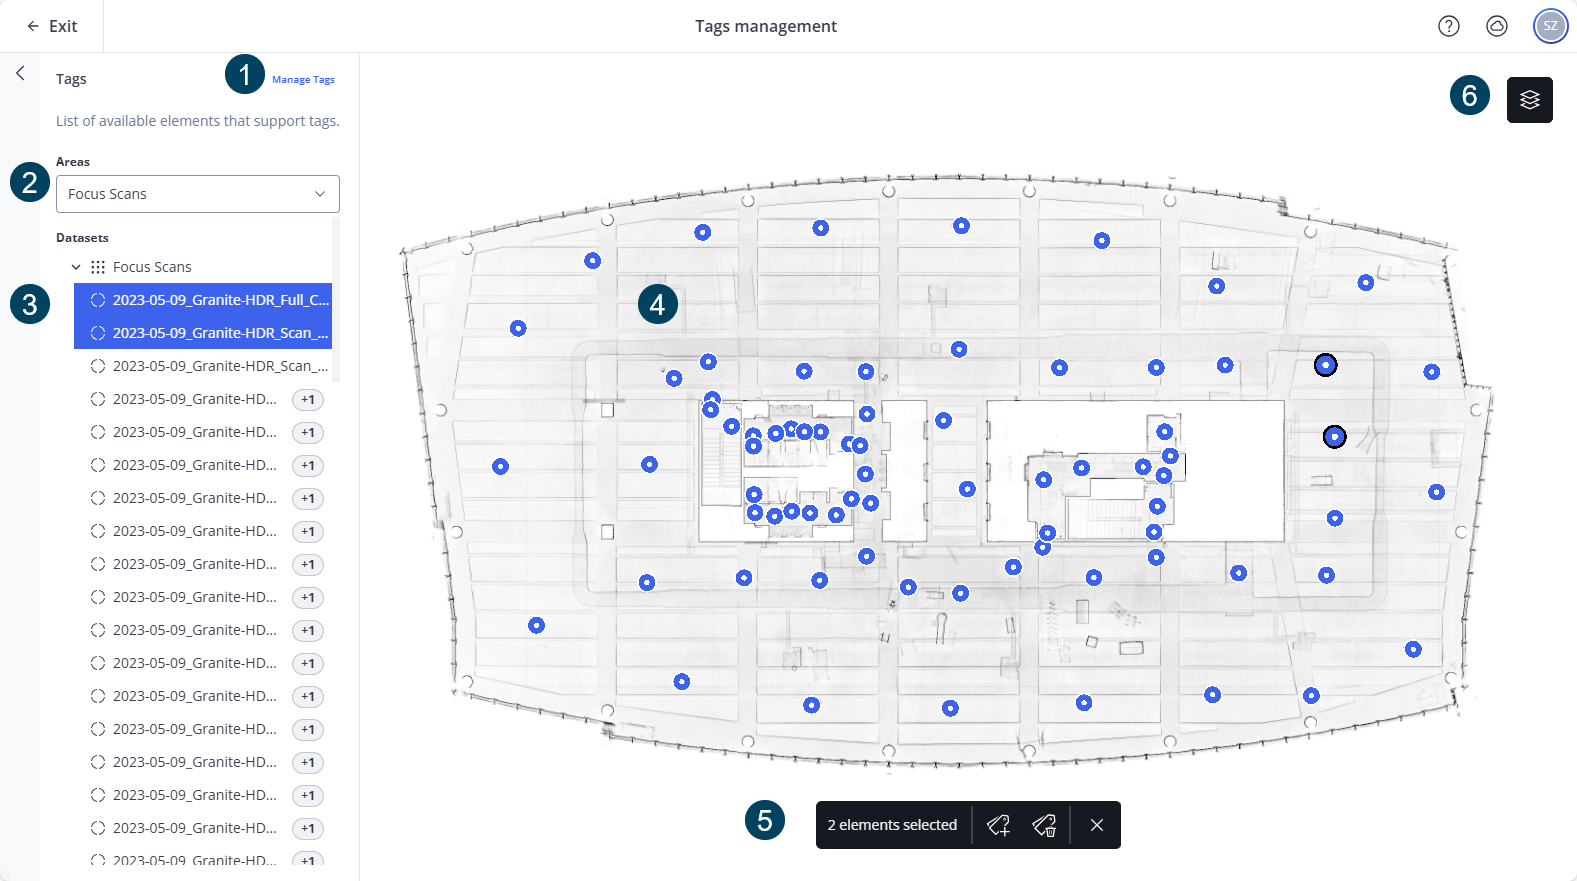
Figure 1-186 Assign tags view
You can hide and display sheets in the 2D view  )
)
Assign Tags to Selected Elements
If you need more tags, you can click Manage tags 
-
If required, select an area from the dropdown list
 )
) -
Select the object to which you want to assign a tag in the tree view
 )
) )
)
Press and hold the CTRL key to select more than one object. Selected objects will be highlighted in the tree view and in the 2D view.
If one or more objects are selected, the tags toolbar is displayed  )
)
-
Click the
 icon to open the Add Tags form.
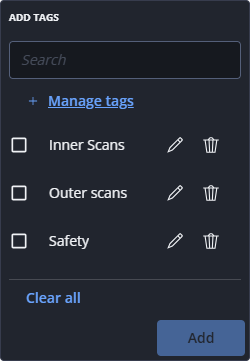
Figure 1-187 Add Tags form
-
Mark the checkbox of the tag that you want to assign to the selected object.
You can select and assign more than one tag.
To unassign a tag, unmark the checkbox.
If there are a lot of tags, you can search for tags in the Search field.
If you want to add a new tag, click Manage tags to open the Tag Management form.
You can also edit and delete tags in the Add Tags form. The procedure is the same as in the Tag Management form, see Edit and Delete Tags.
Remove Tags from Selected Objects
Click the ![]() icon in the tags toolbar )
icon in the tags toolbar )
All tags will be removed from the selected objects. You cannot undo this.
Assign Tags via the Three-dots Menu
This option allows you to assign tags to one or more scans and waypoints.
The menu is available in the project structure view and in the context menu by right-clicking a scan or waypoint in the Viewer. Note that if you use the context menu in the Viewer, you an only assign tags to one single object.
-
In the project structure view, click the three-dots menu of the scan or waypoint to which you want to assign tags.
If you want to select more than one scan or photo, keep the CTRL key pressed while clicking the scans or photos. -
Select the
 Assign tag entry.
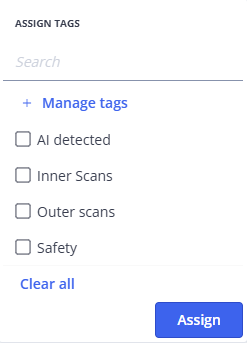
Figure 1-188 Assign tags via context menu
-
Mark the checkbox of the tag that you want to assign to the selected object.
You can select and assign more than one tag.
To unassign a tag, unmark the checkbox.
If there are a lot of tags, you can search for tags in the Search field.
If you want to add a new tag, click Manage tags to open the Tag Management form.
Assign Tags via the Time Travel Dropdown
This option allows you to assign tags to a single 360° photo or all 360° photos of a time point.
-
Select the 360° photo in the 2D view or in the project structure view.
The walk mode view of this photo will be opened. -
Click the three-dots menu of the 360° photo in the walk mode view.
-
Select the
Assign tag entry.
The form is the same as described under Assign Tags via the Three-dots Menu.
