Correspondence Split View
|
1238888 |
The correspondence split view shows two scans side by side in either 3D view or quick view. In the correspondence split view, you can find and force correspondences between two scans to prepare registration. You can also use the correspondence split view to check and compare registration results.
-
To open the correspondence split view, right-click the Cluster node in the structure view.
-
From the context menu select View > Correspondence Split View.
You can also open the correspondence split view in the Scan Manager Properties or in the interactive registration.
The screen splits into two windows. In addition, a toolbar is displayed that provides options for marking targets as well as finding, forcing and clearing correspondences.

Figure 10-5 Correspondence split view toolbar
-
Drag one scan into the left window and another into the right window.
If you want to find correspondences between the scans, both scans must either already have target references or you must mark targets, like planes or points. The procedure of marking targets is similar to the procedure described in chapter Manual Registration.
Find Correspondences
-
Rotate, move, or zoom the two scans until you have them in a useful position, i.e., they show the same part of the scenery.
-
Click the Find Correspondences button
 .
.
SCENE starts to search for corresponding objects and will mark them with a label.
A label shows a name with a maximum of 9 characters. If the name has more characters, only the last 8 will be displayed and an asterisk (*) will replace the missing characters. When you click a label, the name is shown completely.
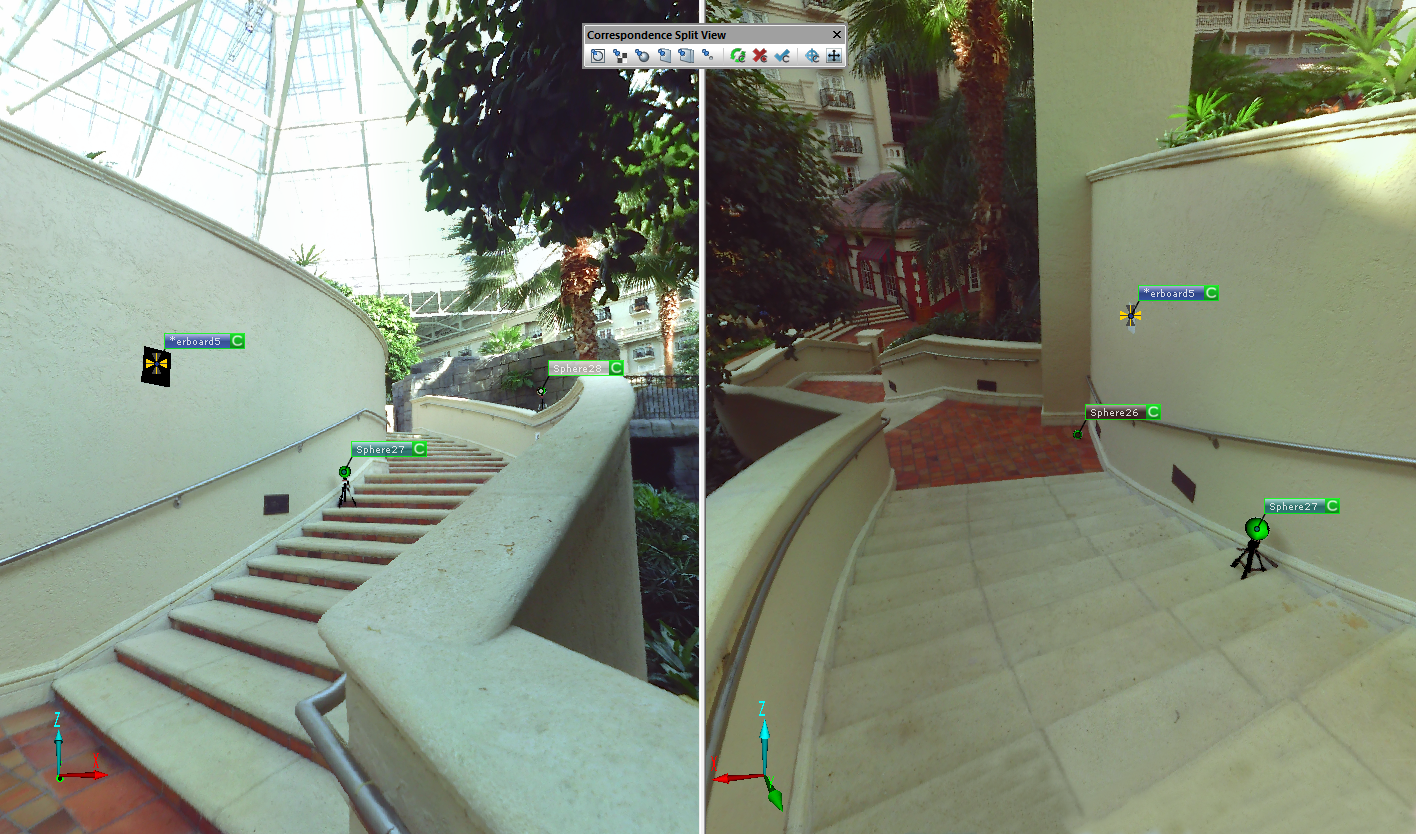
Figure 10-6 Correspondence split view with automatically detected targets
When a correspondence has been found, the label gets a small green field with a C which indicates that these correspondences were found automatically.
The frame around the label shows the quality of the correspondence:
-
Green: good quality
-
Yellow: compromised quality
-
Red: seriously compromised quality
Mark Targets to Find Correspondences
-
Check if there are corners, angles, planes, etc. which could be useful and which are not yet marked.
-
Click one of the following buttons and mark the same target in both scans.
 : marks a point
 : marks a plane
 : marks a circular flat target
 : marks a checkerboard target
 : marks a sphere
 : marks a slab
If SCENE detects that the marked objects are correspondences, it will mark them with a label.
Force correspondences
-
Check if there are more objects which could be useful and which are not yet marked.
-
Click the Force Correspondences button
 .
. -
Select the first object in the left window.
-
Select the corresponding object in the right window.
-
Repeat the above steps until you have marked all objects for which you want to force a correspondence.
If SCENE detects that the newly marked objects are correspondences, it will mark them with a label.
-
If no correspondences are found automatically, you can force them by clicking the Force current correspondences between shown scans button
 .
.
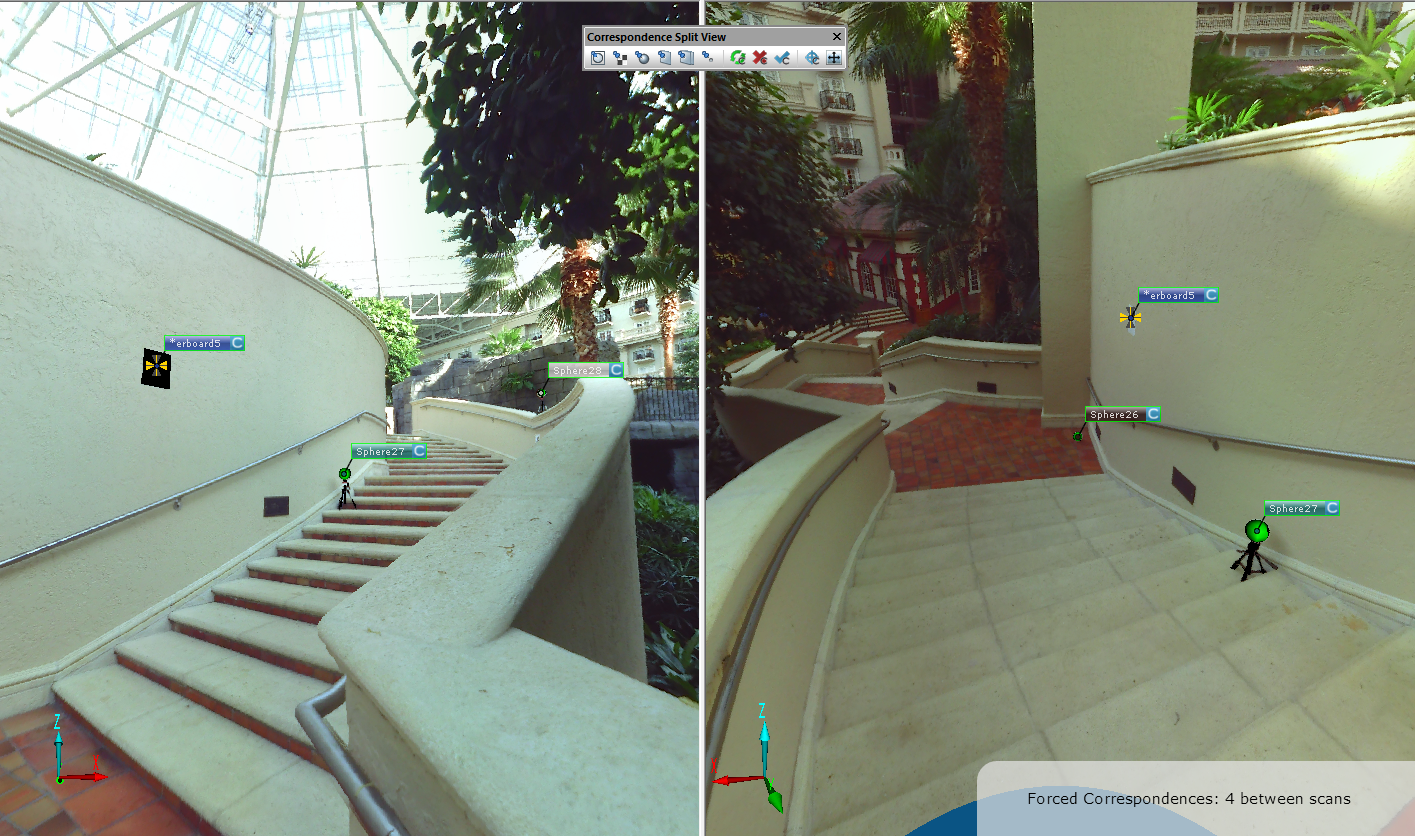
Figure 10-7 Correspondence Split View with corresponding and forced targets
SCENE will now force correspondences between these objects. Their labels will then show a small blue field with a C which indicates that these correspondences are forced.

