Manual Registration
|
123-2026-04-28-888 |
The manual registration and the visual registration are troubleshooting options that you can use when the automatic registration does not work.
The Manual Registration can be executed for a cluster.
It offers the possibility to identify corresponding scan points of two scans by picking such scan points. As soon as there are sufficient corresponding scan points, SCENE will register the two scans. The result can then be viewed and evaluated in the correspondence view.
Manual Registration uses inclinometer data, if set in the Registration Settings.
There are three ways to start a manual registration:
-
Click the Manual Registration button
 in the toolbar.
 -
Open the Registration dropdown list in the Cluster Management, then click Manual Registration.
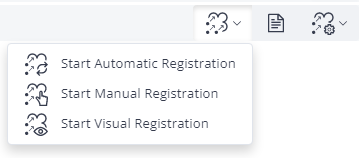
Figure 9-24 Select Registration option in the Cluster Management
-
Click the recommendation to perform a Manual Registration in a cluster line.
Manual Registration from the Toolbar
-
Click the Manual Registration button
in the toolbar. -
Select a cluster.
Manual Registration from the Cluster Line
Open the Registration dropdown list in the cluster’s line, then select Manual Registration.
Select Scans
When a cluster is selected, Select Scans is shown. In this step, scans or clusters that must be registered with each other, can be selected.
-
Click Select Scans on the upper right of the header line.
Now, the display is divided into two columns, and each column shows previews of the scans in the selected cluster.
-
You can filter the lists by name. Enter the string in the Find name... field above each column.
-
It is also possible to sort the scans by Recording Time and Name. Click the text to open the selection, then select the type of sorting. Click the small field with the triangle to sort upwards or downwards.
-
For the right column, it is possible to sort by the Best Match. Best Match means that scans with a similar recording date as the selected scan on the left side are shown first. For every sort method except for the Best Match, it is possible to reverse the sort order by clicking on the triangle next to the dropdown.
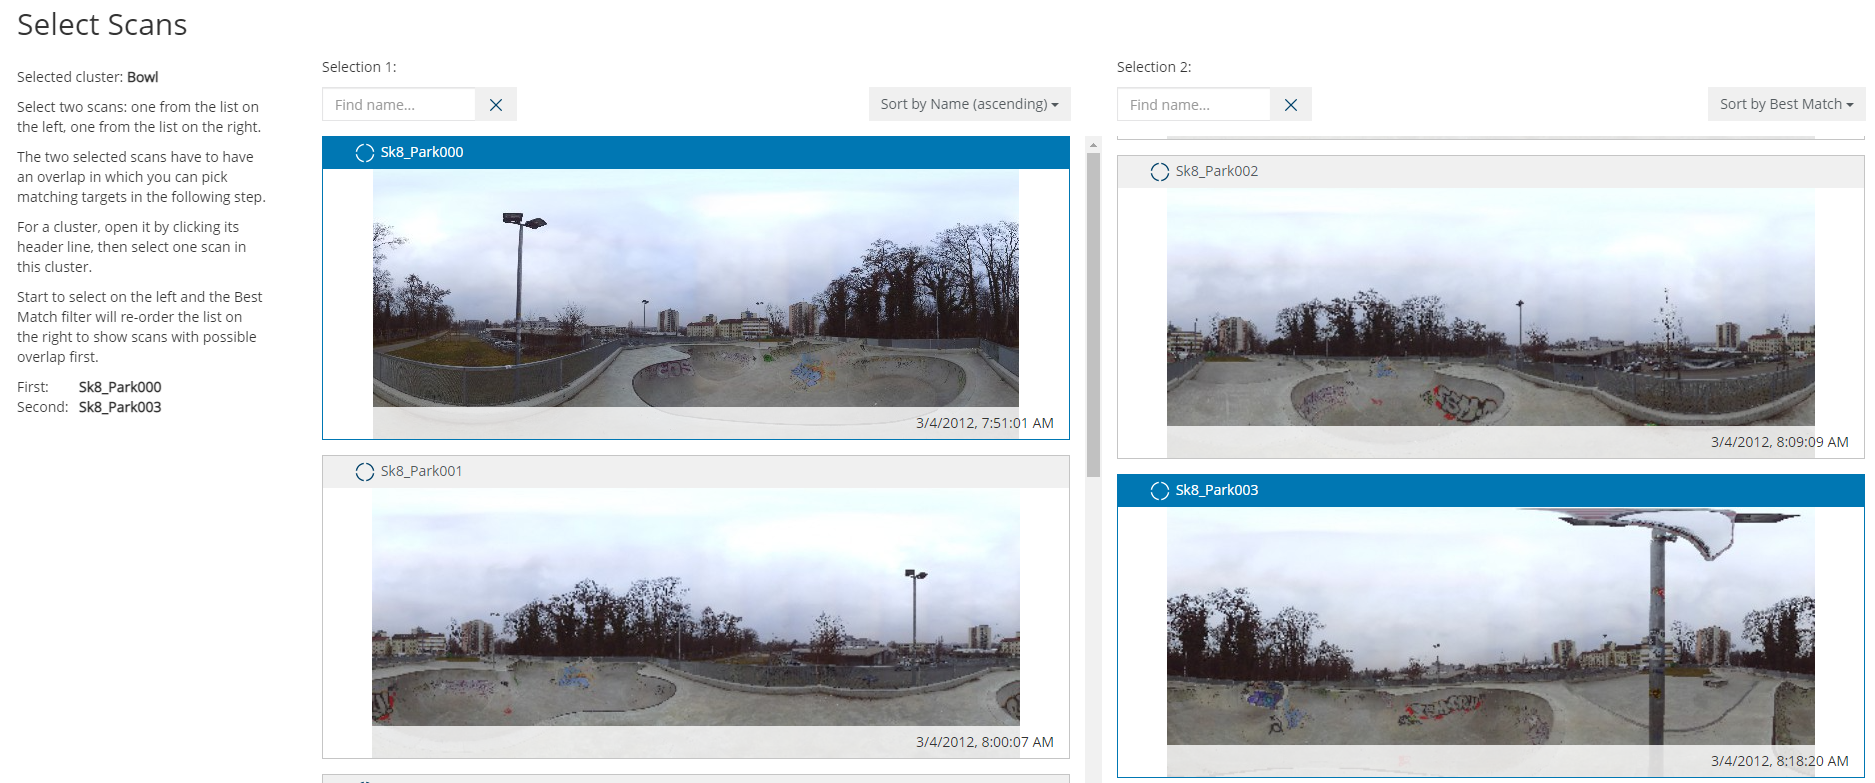
Figure 9-25 Manual Registration task, first step: select scans
-
Select a scan by clicking its preview. The header of the scan preview is marked blue. The preview of this scan in the other column will be grayed and is no longer accessible.
-
If by accident the wrong scan was clicked, simply click another one.
-
If a cluster contains a subordinate cluster, the scans in these clusters are displayed as a single group of scans. To register such a subordinate cluster, pick one representative scan. Selected subordinate clusters are also framed in color, they can be expanded or collapsed.
-
-
Change to the other column and select a second scan by clicking its preview. Again, the scan preview is marked with a blue triangle in its upper left corner. The preview of the same scan in the other column will be grayed and is no longer accessible.
Mark Targets
-
Click the Mark Targets button on the upper right side of the header. Now, the display changes to the Split View.
-
In the column on the left side, SCENE will show buttons, notes, and advice which guide you through the registration.
-
The two windows show each the two selected scans in a quick view.
Some types of scans will be shown in a 3D view, for example handheld scans.
Rotate, move, zoom the two scans until you have them in a useful position, i.e., they show the same part of the scenery.
-
-
Check for natural targets like points or planes, or artificial targets like spheres, markers or checkerboards which could be useful and which are not marked yet. Usually planes work better than points.
-
Select the Mark Point button
 to mark a point.
 -
Select the Mark Plane button
 to mark a plane.
 -
Select the Mark Sphere button
 to mark a sphere target.
 -
Select the Mark Checkerboard button
 to mark a checkerboard target.
 -
Select the Mark Marker button
 to mark a marker
-
When marking a point in SCENE it’s possible for you to click a position where no point actually exists. SCENE always selects a group of points around the place you clicked, calculates the median point, and marks that point. (This can have unexpected consequences if the points in the group appear close in your view, but are actually far apart in the 3D view. Because of this, we suggest that, whenever possible, you mark planes instead of points.)
Plane Normals
A plane is identified by the fact that it is level, i.e., there is precisely one direction that the plane stands perpendicular to (actually, there are two such directions; however, they are exactly opposite to one another). This direction is called the Normal of the plane.
Some types of scans will be shown in a 3D view, for example Freestyle3D scans.
In this case, an additional Invert Plane Normal button is displayed on the image, This button can be selected to invert the Normal. This avoids that the scan is placed with a flipped orientation. Mark the targets by hopping and clicking between the windows.
Correspondence Tools
There are three tools that can help you locate and work with correspondences: Find Correspondences, Clear Correspondences and Force Correspondence
Find Correspondence
When you click this icon, SCENE will attempt to automatically locate correspondences in the scans. If SCENE detects that there are correspondences among the newly marked objects, or one of the newly marked target corresponds to an earlier marked target, it will mark them with a label.
The label then has a small green field with a “C” which indicates that those correspondences were found automatically.
The frame around the label symbolizes the quality of the correspondence:
-
Green: good quality
-
Yellow: compromised quality
-
Red: seriously compromised quality
Continue with marking correspondences until the button on the upper right side changes from Mark Targets to Register and Verify, and gets a green color. This means that there is a sufficient number of correspondences to perform the registration.
Clear Correspondence
If you want to start over, you can click the clear correspondences button to remove all correspondences.
Force Correspondence
You can force a correspondence between two points. Click the Force Correspondence button; the cursor changes to show cross-hairs:  . Click the two points where you want to force the correspondence. Use it only if you are very sure that your targets are placed correctly. For this purpose, you can also select unique locations in the scan, for example, a unique wall in the scan or a corner of a door or window.
Delete specific targets or correspondences
It may happen that, at the end, your scans show marked targets which were not needed for a correspondence, or you want to delete a correspondence because it is wrong.
Right-click the correspondence, then click Delete ‘name’.
If two or more correspondences are very close to one another, a list will be shown. Select one of the correspondences by clicking on it, then click Delete ‘name’.
Register and Verify
-
Click the Register and Verify button on the upper right side.
The registration is executed. -
Verify the registration.
-
Click either the Finish button, if there are no more scans in this cluster, or click the Next Pair button to register the next scan pair.
Auto Cluster
To save registered pairs during registration, they are moved into a so-called AutoCluster. It is created below the previously selected cluster, which is the cluster in which scans pairs are to be registered. If SCENE needs more than one AutoCluster, these AutoClusters are numbered.
After all scans and clusters were registered, these automatically created clusters are removed.
If you cancel a registration for some reason, you will see such an Auto Cluster in the Registration Dashboard.
Optimize Registration
Optimize Registration always offers a Cloud-to-Cloud registration. To do this, click the Start Optimization: Cloud-to-Cloud button.
After a manual registration, the cluster contains scans with user-defined targets. A target-based registration can be performed using Start Optimization: Target Based step button.

