Import a .geoslam File to Create a New Project
|
1238888 |
You can import and process raw data sets in .geoslam format captured by handheld scanners into SCENE to create a new project. See also Resulting SCENE Project for information on the output files.
Import .geoslam File
Proceed as follows to import the .geoslam file and start the processing.
-
Find the .geoslam file you want to import in your file system.
-
Drag it onto the SCENE start page.
The following dialog is displayed:
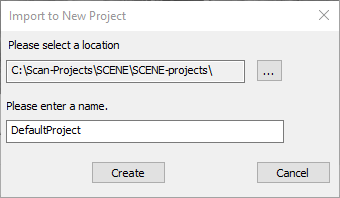
Figure 7-6 Import to New Project dialog
-
Select a file location, enter a file name and click Create to create the project.
The .geoslam file will be imported and a new project will be created in SCENE. A confirmation will be displayed when the import is finished.
Process the Imported .geoslam File
You can now continue with the file processing. The procedure is similar to the processing of other data sets in SCENE. However, there is a specific page for the SLAM scan processing. For more information seeProcessing Settings for SLAM Scanner.
You can monitor the processing progress in the Processing Activity form.
To open this form, click the  icon in the top right corner. The following form is displayed:
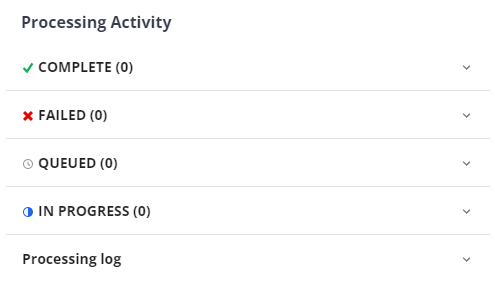
Figure 7-7 GeoSLAM Processing Activity form
The processing is subdivided into the processing stages SLAM, Filter, Colorizing, Flash, Finalizing. If you deselect processing options on the SLAM Scan settings page, these options will be grayed out in the GeoSLAM Processing Activity form, see figure above.
- Complete: Shows completed imports.
-
Failed: Shows failed imports. If an import fails, you should open this section and check the error messages.
-
Queued: SCENE can process one import at a time. Additional imports will be queued and shown in this section.
-
Processing Log: Shows technical information about the processing procedure.
Do not close the project or SCENE while processing is running. Otherwise, all progress will be lost.
You can use the SLAM scan processing only once after you have imported a .geoslam file. Once the processing is finished, it is not possible to reprocess the project with these settings.

