Visual Registration
|
123-2026-04-28-888 |
The manual registration and the visual registration are troubleshooting options that you can use when the automatic registration does not work.
Visual Registration provides an option to place scans and clusters view by moving them with drag and drop. In other words, the visual registration is like a puzzle where you have to fit the pieces, i.e., the scans, together. The result can then be viewed and evaluated in the correspondence view. After a placing, an Automatic Registration can be started to refine the registration.
There are three ways to start a Visual Registration:
- Click the Visual Registration button
 in the Registration toolbar.
You will then be asked to select a cluster. - Click the Visual Registration button in a cluster line. Select the settings to start registration.
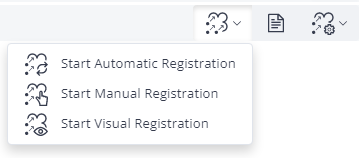
Figure 9-26 Select Registration option in the Cluster Management
- Click the recommendation to perform a Visual Registration in a cluster line. Select the settings to start registration.
Select Cluster
In the first step, select a cluster that must be used for registration.
Select Method
In the second step, select a method that must be used for registration:
- Click the Select Method button on the upper right side. The Select Method dialog is shown.
- Visual Registration provides only two methods:
Cloud-to-Cloud
- Target-based
Place and Register
In the third step, place and register the scans. For this purpose, think of the scans as pieces of a puzzle that you must assemble.
A correspondence view is opened on the selected cluster.
-
Click the scan tag.
Rotation and movement manipulators are shown on the scan. -
Drag and drop the scans.
Look for unique points in the scans, e.g., trees or buildings and align them. To adjust the height, select the side view (front, back, left or right). -
Place all scans and clusters correctly in the correspondence view. Click the button Start Registration.
If the registration is successful, the result is displayed in the 3D view or through the Registration Report. If the registration is not successful, a dialog is shown to inform the user.
To better be able to place the scans/clusters and verify the result, select Unique Color or Scan Color or create an Auto Clipping Box.

