Preferences
Click the Preferences command on the Quick Bar or File >Preferences to open the dialog box.
General Preferences
| Language |
Choose the default language. Changing the language requires you to restart the software. |
| Image Max Size | Choose the maximum size (in pixels) for imported images. |
| Blood Spatter Draw Mode |
Select one of the following blood spatter draw modes:
|
| Enable FARO Experimental Features |
Enable features in the Experimental ribbon. |
General > Backups
| Auto Save |
Select the frequency to automatically save the project to the _backups folder. Auto save automatically saves projects following changes and at designated time intervals. |
| Incremental Save | Enter the number of changed versions of the drawing to retain for auto save. |
| Use FARO Open|Save Dialog |
Use the FARO dialog for opening, saving, previewing, and sharing projects. If you do not select this option, normal Windows folder functionality is used. |
General > Misc
| Disable Parallel Save | Parallel saving results in faster saves (manual and automatic ), but this technology can cause issues on some computers. If you are having save/load issues, disable this option. |
| Default Satellite Map | Choose Google or Bing map as the default. |
| Use FARO Open|Save Dialog |
Use the FARO dialog for opening, saving, previewing, and sharing projects. If you do not select this option, normal Windows folder functionality is used. |
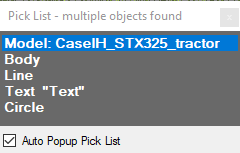
| Pick List - Auto Popup when multiple objects found |
Displays a pick list that allows you to easily select objects that are stacked on top of each other.
|
| European Decimal |
Use the European decimal system for measurements. For example 1.00. |
| Double Click to Clone Object | Enable this option to make a copy of an object that you double-click. |
| SCENE Navigation mode by default |
Default to SCENE navigation mode. |
| Enable Online error logging |
Automatically send software errors to FARO. |
| Properties panel remembers min/max state |
Apply min/max restrictions to property panel options. |
| Default to Project Save |
Save the entire project when you click Save. |
| Reverse Mouse Wheel Zoom Direction |
Move the mouse wheel forward to zoom. |
| Damage - Default to Zero | |
| Models - Default Show Resize Grips | Display or hide the grips for models that you place in the drawing. |
| Admin Setup | |
| Factory Reset | Reset all preferences to their default settings. |
Display Preferences
| UI Scale | Choose the display size for the GUI. |
| Color Theme |
Choose color options for the ribbon. |
Background Color & Grid
| 2D Background Color | Choose the background for 2D mode. |
| 3D Background Color | Choose the background for 3D mode. |
| Show Grid | Display the grid pattern in the background. Click Show Axis to highlight the axis lines. |
| Show Solid |
Display the background as a solid color. |
| Snap Grid | Enable the snap grid. |
Highlight Objects
| Highlight color | |
| Thickness | r default settings. |
Navigation Cube
| Show Navigation Cube |
Display the navigation cube and customize the colors for the sides, corners, and text. |
Misc
|
Show Frames Per Second status display |
Display the FPS setting for animations |
|
Disable object measurement labels |
Hide object measurement labels. |
| Large Animation Slider | |
| Render 2D Symbols DPI |
Customize the DPI for 2D symbols. |
Misc
| Show Frames Per Second status display |
Display the FPS setting for animations |
|
Disable object measurement labels |
Hide object measurement labels. |
|
Render 2D Symbols DPI |
Customize the DPI for 2D symbols. |
|
|
|
| Advanced |
Shadow Quality - Select a shadow quality setting for when you select to enable shadows in lighting options. Light Bloom - Add a light bloom (glow) around a light source to add realism. Enable Anti-Aliasing - Apply a smoothing effect to lines in drawings. Enhanced 3D Textures - Enhance 3D textures to make them appear more realistic. Use HDR Lighting as Default - Default to using HDR lighting when applying lighting. See High Dynamic Range (HDR) Lighting. |
| Style UI |
Select a preset for the UI color scheme, or create your own. |
| Style Grips |
Select a preset style to change grip colors or create your own color scheme. |
| Style Snaps |
Modify snap styles, including fill and outline colors, scale and thickness. |
Advanced
| Shadow Quality | Select a shadow quality setting for when you select to enable shadows in lighting options. |
|
Light Bloom |
Add a light bloom (glow) around a light source to add realism. |
| Enable Anti-Aliasing | Apply a smoothing effect to lines in drawings. |
| Enhanced 3D Textures | Enhance 3D textures to make them appear more realistic. |
| Use HDR Lighting as Default |
Default to using HDR lighting when applying lighting. See High Dynamic Range (HDR) Lighting. |
|
|
|
| Style UI |
Select a preset for the UI color scheme, or create your own. |
| Style Grips |
Select a preset style to change grip colors or create your own color scheme. |
| Style Snaps |
Modify snap styles, including fill and outline colors, scale and thickness. |
| Style UI |
Select a preset for the UI color scheme, or create your own. |
| Style Grips |
Select a preset style to change grip colors or create your own color scheme. |
| Style Snaps |
Modify snap styles, including fill and outline colors, scale and thickness. |
Performance Preferences
| Clip Objects Off Screen | Select this option to keep objects that are off screen in memory. This improves the performance of the product for working in the visible window, but you may need to wait momentarily when you scroll to areas of the drawing that are outside of the visible workspace. |
| Clip Tiny Objects | Limit the display of smaller objects until you zoom in on them. Enabling this option increases the overall performance of the application. |
| Cache Objects | ?? |
| Performance Boost | ?? |
| Detect Bogus Extents | ?? |
Folder Preferences
Configure the defaults for all of the folder types associated with FARO Zone 3D.
Animation Preferences
| Delay after animation finished |
Add a delay (in seconds) before a completed animation resets to the beginning or a looped animation restarts. |
| Loop Animation |
Repeat playback of the animation until you press Stop or Pause. |
| Reverse Steering Angles |
Reverse the animation. |
| Disable Automatic Animation Path Smoothing |
Do not apply a smoothing effect to animations. |
| Use New KEP Manager |
Animation > Recording
| Recording Frames per Second |
Adjust the animation smoothness and quality by selecting FPS. |
| Recording Quality |
Select the recording quality for animations. Higher quality settings result in larger project file sizes. |
| Recording Frame Naming Mode |
Choose the label type for recorded frames. Select numerical (Index) or timestamp. |
| Panoramic Recording |
Select the pano frames per second value, and select the recording resolution. |
Animation > Panoramic Recording
| Pano - FPS |
Select the pano frames per second value, and select the recording resolution. |
| Pano - Resolution | Use the dropdown to select the resolution for the panoramic recording. |
Animation > Dashboard HUD
Toggle items to display in the animation HUD (Heads Up Display).
| Show Elapsed Time | |
| Show Distance | |
| Show Distance to Impact | |
| Show Time to Impact | |
| Show Acceleration | |
| Show Velocity |
Animation > EDR HUD
| Show Airbag (EDR Only) | |
| Show Accelerator Pedal Position (EDR Only) | |
| Show ABS Activity (EDR Only) | |
| Show Steering Input (EDR Only) | |
| Show PCM Throttle Position (EDR Only) | |
| Show Service Brake (EDR Only) | |
| Show Distance to Impact (EDR Only) | |
| Show Time to Impact (EDR Only) |
Animation > After Recording
| Play Video | Play the video following the recording. |
| Open Folder | Following the recording, open the folder that contains the video file. |
Point Cloud Preferences
| Cloud Snap Optimization |
Optimize the point cloud for accurate snapping and performance. Unchecking this option may improve snap accuracy, but it may degrade performance. |
| Display |
Set display properties pertaining to the Navigation Cube, Skybox (backdrop), and Grid Planes. |
| Point Cloud Models - Max Points |
Set the maximum number of points to display without requiring reloading of the point cloud. If performance is affected, decrease the number of points. This setting does not change the point cloud, only the number of points that display. |
| Point Cloud Selection Size |
Select the default number of points for selections. Default is 2,000,000. |
| Cloud Rendering Optimization |
Select the level of cloud point rendering. Higher rendering settings affect software performance. |
| Default Cloud Point Size |
Select the default point size. 2.00 is the default. |
