Creating a Point Cloud Profile Line
You can generate a profile line from your point cloud. Profile lines are useful for creating a profile of terrain, or a roadway. They can also help you visualize slope. You can place a vehicle on the profile line and view it from the side to establish the driver's of sight. For example, you could establish whether a driver could see over a hill as another vehicle approached from the opposite side.
To add a point cloud profile line:
-
Select a point cloud and from the Point Cloud ribbon select
 Point Cloud Tools.
 -
From the Point Cloud tool panel, click Create Point Cloud Profile Line.
-
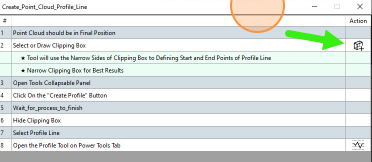
The Workflow panel displays. This panel includes the steps required to create the line. You can launch commands that display in the Action column.
-
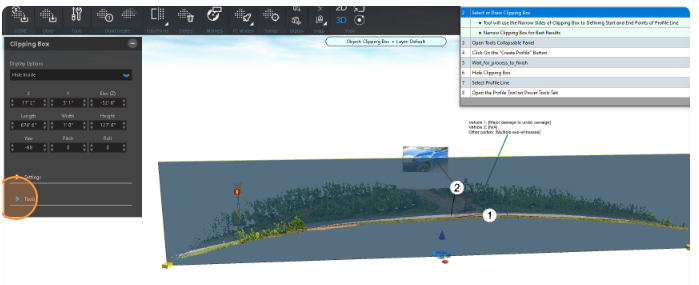
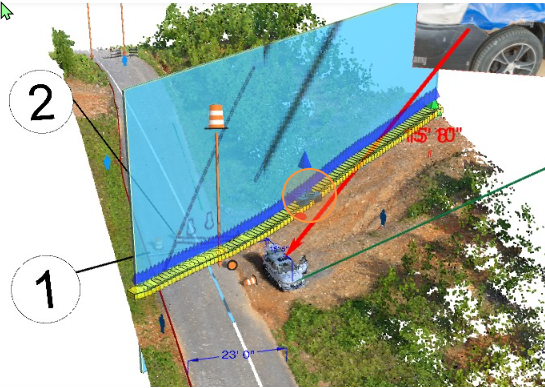
Create a narrow clipping box along the area of the point cloud on which to create the profile line. Select the Add Clipping Box command from the Workflow dialog, or from the
 Point Cloud ribbon.
 -
After you add and position the clipping box, click the Tools dropdown from the Clipping Box tool panel and select Create Profile.
-
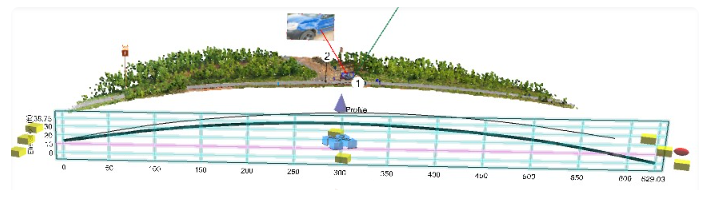
The profile line appears in the clipping box. The profile line is made up of multiple line segments.
-
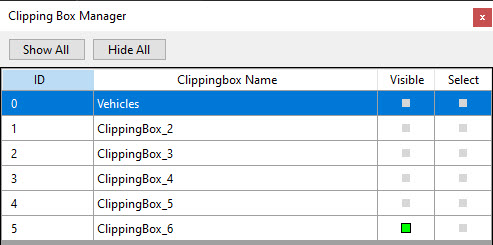
Hide the clipping box by opening the
 Clipping Box Manager from the Workflow dialog (or from the Point Cloud ribbon) and uncheck boxes in the Visible column.
 -
You can select the profile line and move it away from the point cloud.
-
Open the
 Profile tool from the Workflow dialog or from the Power Tools ribbon. See Profile.
 -
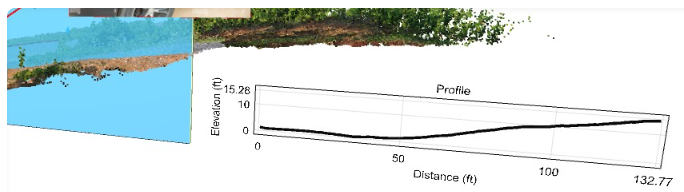
Modify the profile chart and then click Place to place it in the diagram.
-
Use the grips to rotate the profile line.
-
Repeat the process to create additional profile lines from any direction and section of the point cloud.
-
View the profile chart.


