 Signs
Signs
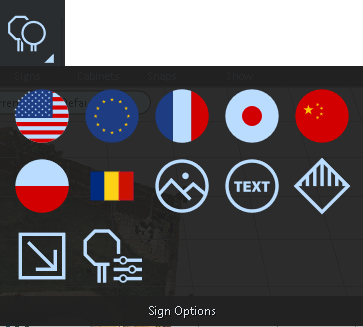
Use the Sign Maker tool to find common signs to place in your drawing, or create customized signs. The Sign Maker tool is located on the Symbols tab.
Inserting a sign from the library
-
From the Symbols ribbon, select the Sign Maker tool dropdown arrow.
-
Choose a sign library.
-
Select a sign category.
-
The following categories are available:
-
Select a sign.
-
Click in the drawing to place the sign.
-
Configure options for the sign in the Sign tool panel.
| Regulatory |
 Recreation Recreation |
 Warning Warning |
Speed |
 School School |
Custom Signs |
 Construction Construction |
Load Signs |
 Info Info |
|
| Markers |
Sign Tool Panel (signs from Library)
| Sign Texture |
Select from the palette of signs. |
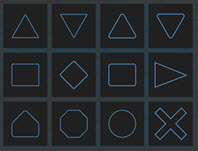
 Sign Shape Sign Shape
|
Select a shape for the sign. Select a shape for the sign. |
 Layer Layer
|
Open the Layer Manager to choose an existing layer or add a new layer for the object. |
| Sign Elevation |
Adjust the placement of the sign on the pole. |
| Pole Height |
Adjust the pole height. |
| Pole |
Toggle this switch on to display the sign pole. Use the color picker to select the color of the pole. |
| Visible 2D |
Display the sign’s text when the software is in 2D mode. |
| Size |
Adjust the width and Height of the sign. Enable Aspect Lock to retain the shape of the sign when you adjust either the width or the height. |
| Save | Adjust the font style, offset and size. Click Back to return to the home tool panel. |
Adjust the size and angle of the sign using the Sign Width, Sign Height and Angle controls, as necessary.
Creating a Text Sign
-
Click the Sign Maker drop-down arrow.
-
Select Text Sign Maker. A street sign displays at the cursor.
Place the sign by clicking in the drawing.
Configure options for the sign in the tool panel.
-
Click Save to save the custom sign in the Custom folder for later use.
-
You can adjust the sign with the standard grips.
Sign Tool Panel (Text signs)
 Fill Color Fill Color |
Select the fill color for the sign. |
 Text Color Text Color |
Choose the color and characteristic for the text. See Color Picker. |
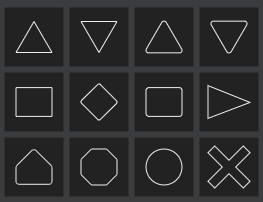
 Sign Shape Sign Shape
|
Select a shape for the sign.
Select a shape for the sign. |
 Layer Layer
|
Open the Layer Manager to choose an existing layer or add a new layer for the object. |
| Text |
Enter the text to display on the sign. |
| Sign coordinates | Adjust the sign's position on the axes, and the Yaw, Pitch, and Roll settings. |
| Text Height |
Increase or decrease the size of the text and the sign. |
| Sign Elevation |
Adjust the placement of the sign on the pole. |
| Pole Height |
Adjust the pole height. |
| Pole |
Toggle this switch on to display the sign pole. Use the color picker to select the color of the pole. |
| Border |
Apply a border to the outer edge of the sign. Adjust details of the border with the color selector. |
| Visible 2D |
Display the sign’s text when the software is in 2D mode. |
| Both Sides |
Display the sign text on both sides of the sign. |
| Size |
Adjust the width and Height of the sign. Enable Aspect Lock to retain the shape of the sign when you adjust either the width or the height. |
| Font Settings | Adjust the font style, offset and size. Click Back to return to the home tool panel. |
| Save | Adjust the font style, offset and size. Click Back to return to the home tool panel. |
Creating a Custom Sign From an Image
-
From the Symbols ribbon, select the Sign Maker tool dropdown arrow.
-
Select Picture Sign Maker.
-
Browse to the folder that contains the image, select it, and click Open.
-
Click in the drawing to place the sign.
-
Adjust the options in the tool panel.
-
Click Save to save the sign as a custom sign.
Sign Tool Panel (Custom signs)
| Sign Texture |
Select from the palette of signs. |
|
Sign Shape
|
Select a shape for the sign.
Select a shape for the sign. |
|
Layer
|
Open the Layer Manager to choose an existing layer or add a new layer for the object. |
 Browse for custom image Browse for custom image
|
Open Windows Explorer so that you can browse for other images to use for the sign. |
| Sign coordinates | Adjust the sign's position on the axes, and the Yaw, Pitch, and Roll settings. |
| Sign Elevation |
Adjust the placement of the sign on the pole. |
| Pole Height |
Adjust the pole height. |
| Pole |
Toggle this switch on to display the sign pole. Use the color picker to select the color of the pole. |
| Visible 2D |
Display the sign’s text when the software is in 2D mode. |
| Size |
Adjust the width and Height of the sign. Enable Aspect Lock to retain the shape of the sign when you adjust either the width or the height. |
| Save | Adjust the font style, offset and size. Click Back to return to the home tool panel. |
