Process and Register Blink Scans
|
1238888 |
There are two options for uploading Blink scans to Sphere XG and starting the workflow, i.e. pre-register and upload via Stream or upload manually.
The changes during upload, processing and registration are made on a draft project. Scans and changes are not available in the Sphere XG Viewer until they are published.
Starting from SCENE 2025.2, projects registered in SCENE will be displayed as registered in Sphere XG and vice versa.
Pre-registration and Upload to Sphere XG via Stream
After capturing Blink scans and pre-registering them with the Stream app, you can upload, process and register them in Sphere XG. For information on the scan process with the Blink scanner and Stream, see Your First Scan Project in the Blink user manual. In this case, the scans will be uploaded, processed and registered automatically.
The better the pre-registration in Stream, the better your registration results will turn out, but you can also edit and improve the registration result manually in Sphere XG.
Manual Upload to Sphere XG
You can also upload scans manually as follows:
-
On the Sphere XG Dashboard, go to the Projects page.
-
Select an existing project or create a new one.
-
On the Overview tab of the Project page, click the Manage data button.
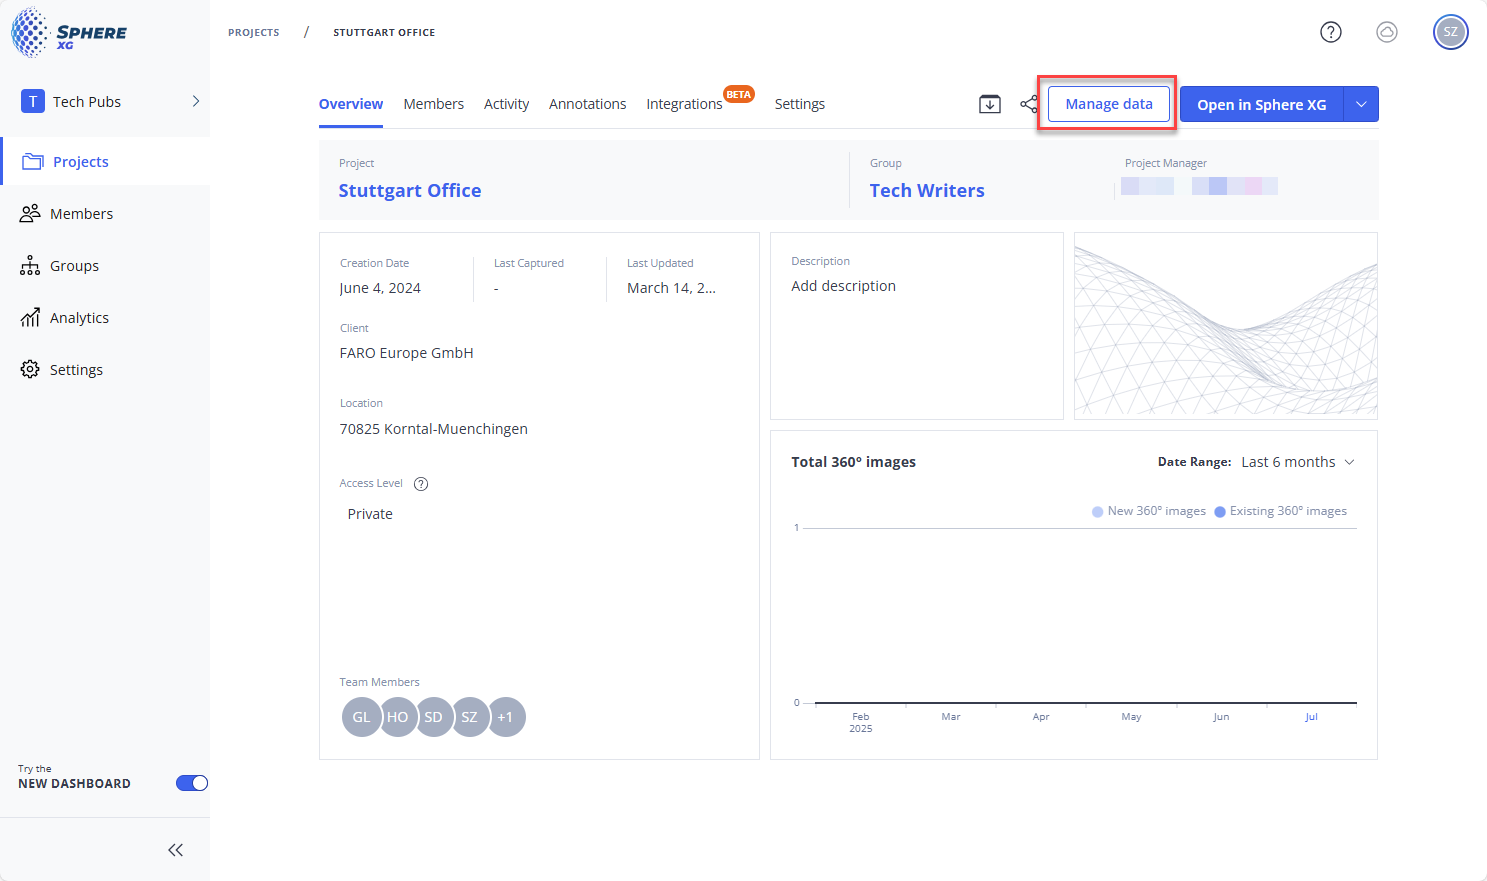
Figure 1-86 Open Blink workflow page
A page will be displayed on which you can make various settings for the Blink workflow
If you use the Stream upload, you will not see this page because the processing, registering and publishing process runs automatically. If you want to use these options, wait until your project is published. Then go back to the Manage data page and click the Publish button to republish your project. Then, the page shown below will be available for your project, too.
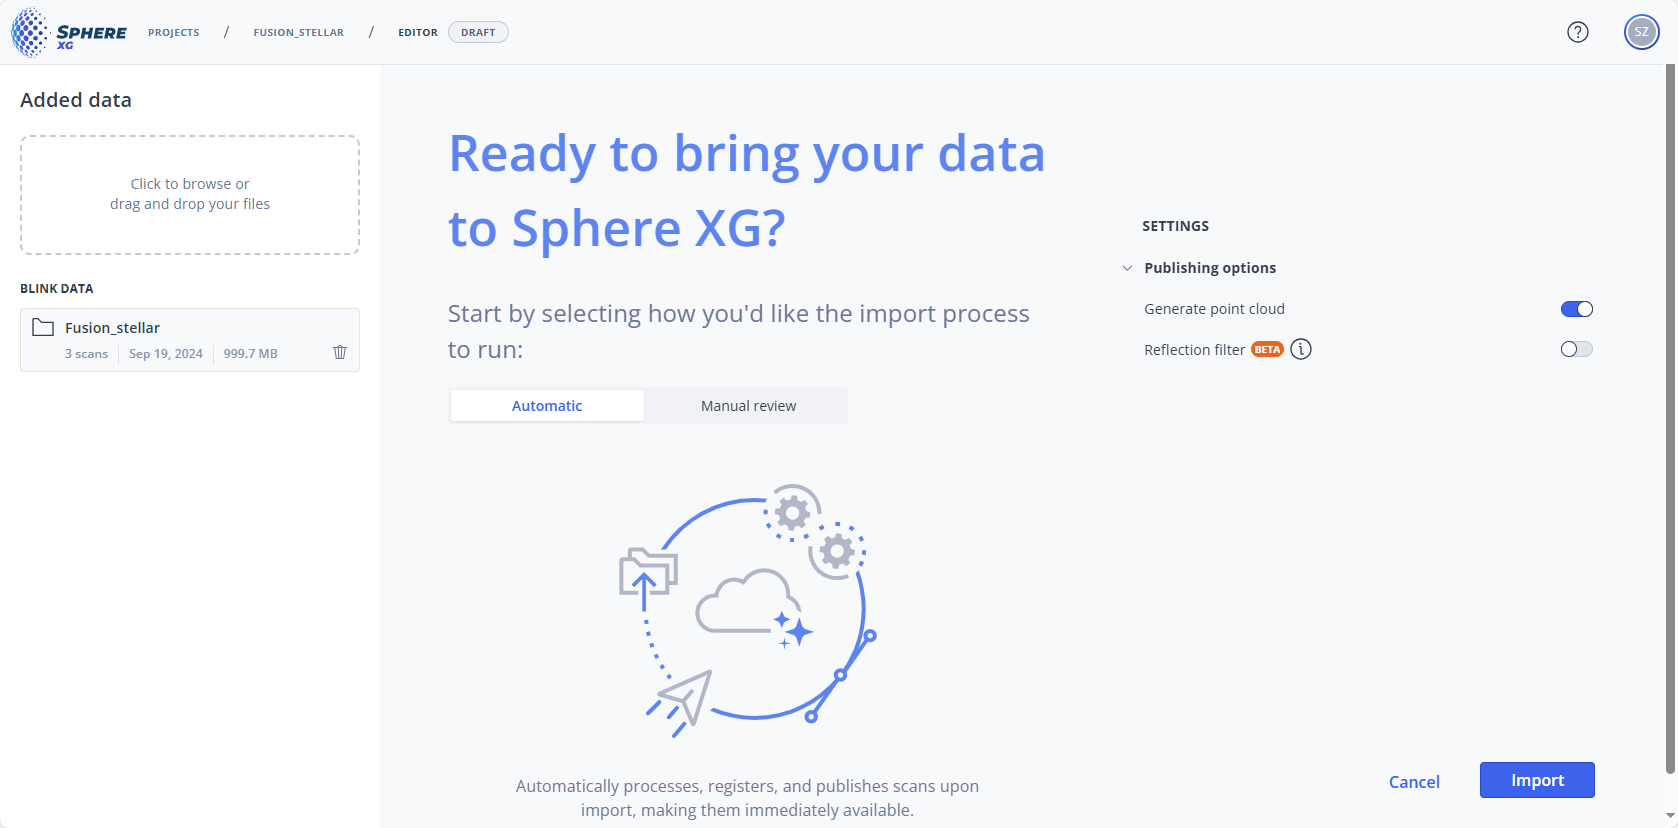
Figure 1-87 Prepare the Blink workflow
-
Optional: Add more data to the project by clicking into the Added data field.
Workflow type and Publishing options
-
Select the Workflow type.
-
Automatic: If you select this option, the project will be published automatically if the Blink workflow finishes without issues.
-
Manual review: When the registration has finished successfully, you will be prompted to inspect and then publish manually. You can also edit the registration before publishing, see Inspect the Registration of Blink Scans.
-
-
Select the Publishing options.
-
Generate point cloud: If you enable this switch, all scans will be merged into a point cloud before publishing.
Otherwise, only the overview map with registered scans and 360° photos will be published. Note that 3D data will not be available. -
Reflection filter (beta): If you enable this switch, reflections caused by reflective surfaces will be filtered out.
This may increase processing time. It is recommended to disable the filter if there are no reflective surfaces. Note that this feature is still in beta state.
-
-
Click Import.
The automatic workflow will start.
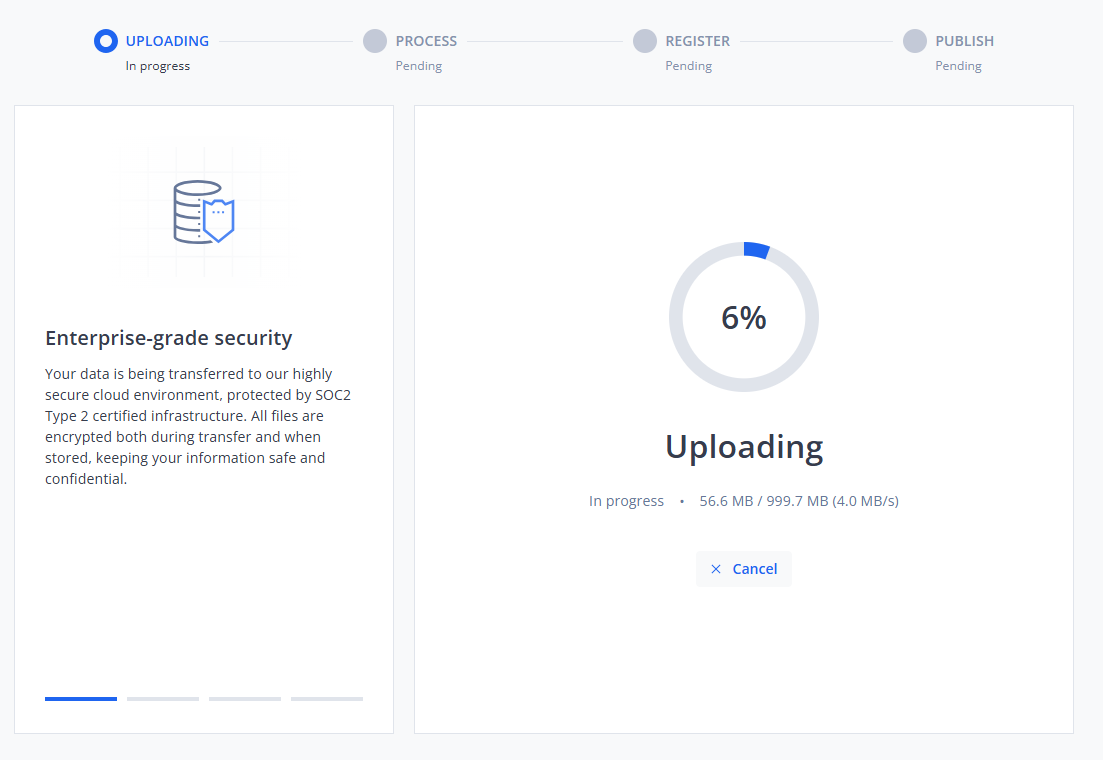
Figure 1-88 Blink workflow in progress
The workflow has the following steps:
-
Uploading: The scans will be uploaded to the cloud.
-
Process: The scans will be processed, i.e. scan point clouds will be created and various other settings regarding the offset, colorization and filtering will be made.
-
Register: The scan point clouds will be registered, i.e. the pre-registration results will be refined and improved.
-
Publish: If you have marked checkbox Generate point cloud, all scan point clouds will be merged into a project point cloud. If all previous steps have finished successfully and you have selected the Automatic workflow type, the project will be published automatically and you can access it in the Sphere XG Viewer, see below. However, you can still change and re-publish the registration. If you have selected the Manual review workflow type, you will be prompted to check the registration result in the Registration - Inspect view before publishing. In this view, you can also edit the registration.
During each workflow step, the progress and status are displayed, see figure above.
If the registration finishes successfully, you will get a notification in Sphere XG and via email.
Adjust the Registration
If the registration fails, the workflow screen will display an error message and you will also be notified via email. You can then adjust the registration manually, see Edit the Registration of Blink Scans.
View Finished Project in the Sphere XG Viewer
If your project has been registered successfully, you can click Let's start! in the notification form to open the project in the Sphere XG Viewer.
Make Changes on the Manage Data Page
If you are not satisfied with the registration result, you can go back to the Manage data page and make changes. The changes that you make on the Manage data page or if you edit a registration only affect the project draft. The project itself remains unchanged until you publish the changes.
Inspect and Edit the Registration
Click the ![]() icon on the Manage data page to open the Registration - Inspect page. See Inspect the Registration of Blink Scans. From this page, you can open the Registration - Edit page.
icon on the Manage data page to open the Registration - Inspect page. See Inspect the Registration of Blink Scans. From this page, you can open the Registration - Edit page.
Add Scans to an Existing Project
You can add scans later by going back to the Manage data page and clicking the Add data icon ![]() .
.
Rename a Scan
-
Hover the mouse pointer of a scan and click the
 icon.
icon. -
Change the name and click
 .
.
Delete Scan from a Project
You can delete scans from a project on the Manage data page, for example if you know that this scan will cause problems during the registration. It is also possible to delete a scan if it cannot be registered while editing a registration.
To delete a scan from a project:
-
Mark the checkbox of the scan you want to delete.
-
Click Remove Scans.
-
Confirm the deletion.
Note that you cannot undo a deletion once it is confirmed.
