Align an Area to a Point Cloud
|
1238888 |
You can align an area to a point cloud. The area is in the first place a spatial container of data but it is visually represented by the uploaded sheet. During the alignment process, you will be working on this visual representation of the area. You should only align an area to a point cloud if you have imported a floor plan separately, for example in .pdf format. For projects which already contain an overview map, this alignment step is not recommended.
It is recommended to align the area to the point cloud or a 3D model and not vice versa, because an area generally has an arbitrary coordinate system. By aligning the point cloud to the area, the coordinate system and the geolocation of the point cloud would be changed.
Open the Alignment Tool
-
Click the three-dots icon
 of the area to open the context menu.
 -
Select menu entry Align
 .
.
The alignment tool is displayed. -
Select the reference element.
-
Click Align in the top right corner to open the alignment tool.
For more information on the alignment tool, see Align Point Clouds, 3D Models, Sheets and Areas.
Set the Point Cloud Elevation
-
Click and hold anywhere in the view and rotate it to a side, front or back view, i.e., any view that provides a good sight at height differences between the area and the point cloud.
-
Click anywhere in the point cloud to move the area to this position.
You can also click and hold any point on the green arrow and then drag to adjust the point cloud elevation.
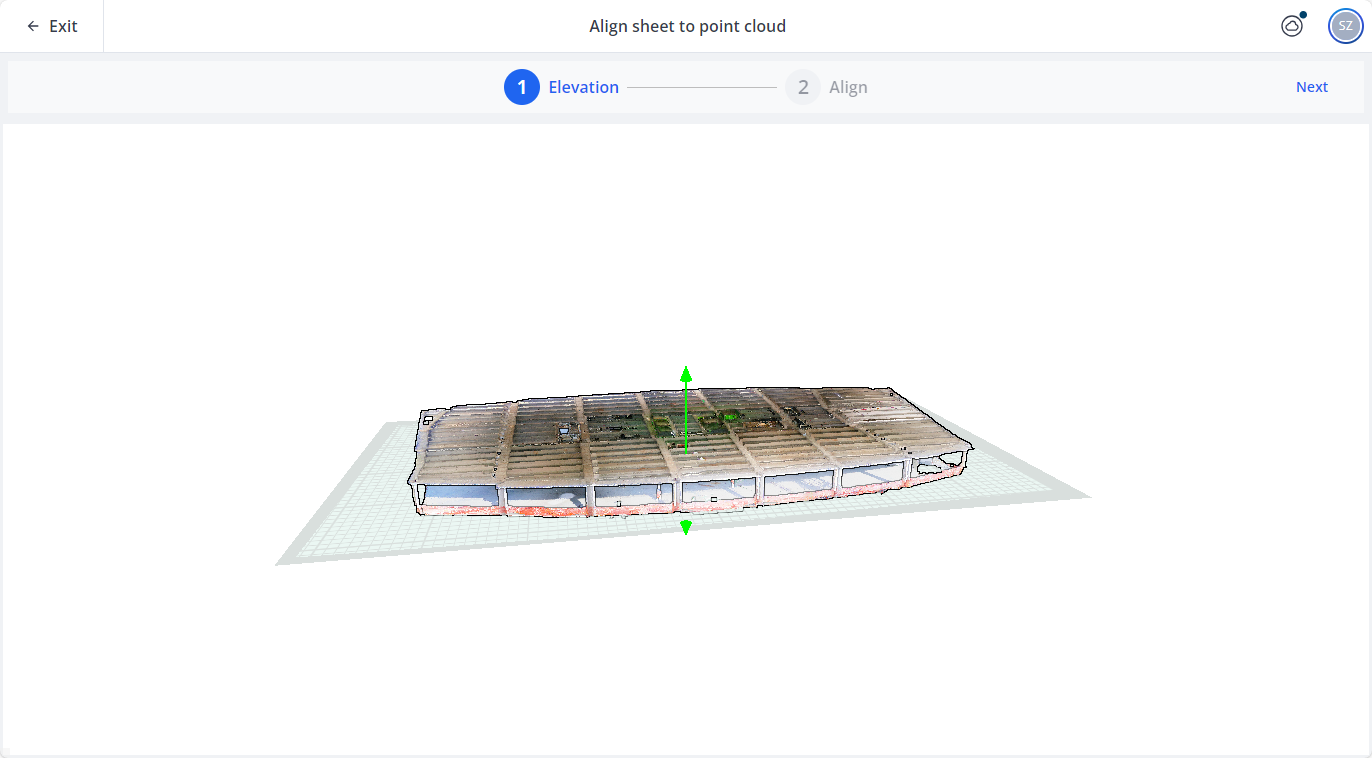
Figure 1-131 Define point cloud elevation
-
Click Next in the top right corner to go to the alignment window.
Perform Horizontal Alignment
The horizontal alignment can be determined using either point pairs, or an overlay mode. You can also use both methods in the order described below.
For a better visibility, you can zoom in and out with the mouse wheel.
Method 1: Point Pairs in Area and Point Cloud
By default, the area and the point cloud are displayed in a vertical split screen. If you feel more comfortable in a horizontal split screen, you can click icon ![]() on the right middle side of the screen.
on the right middle side of the screen.
-
Click a location in the area, for example a corner.
-
Then find and click the same location in the point cloud.
You can move a marker by clicking and then dragging it.
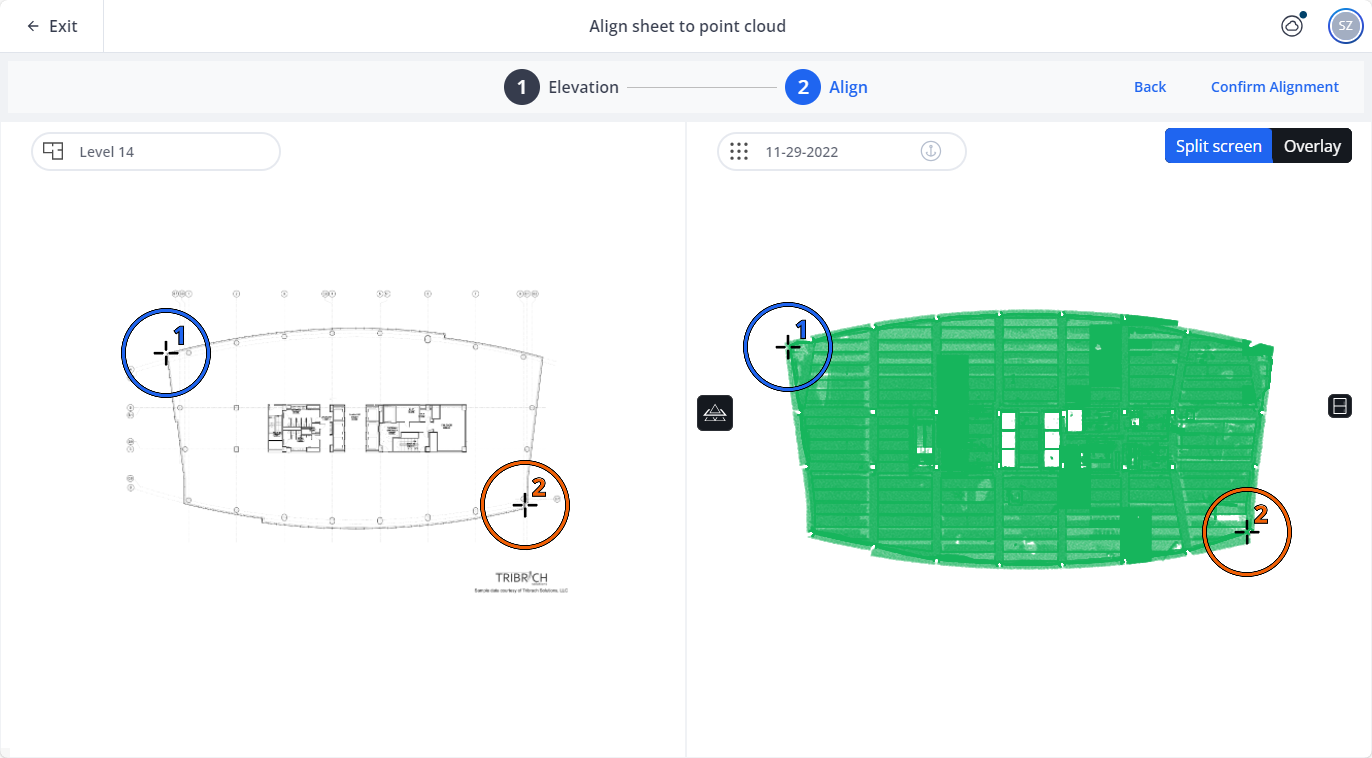
Figure 1-132 Find point pairs
-
If the area is rotated with respect to the point cloud, repeat steps above a second time to lock the rotation.
To remove a marker, right-click it.
By default, the reference element is displayed with a cross section at the defined elevation. To deactivate the cross section and show the full reference element in a tomographic view, click the ![]() icon.
icon.
Method 2: Overlay Point Cloud and Area
-
In the top right of the screen, click the Overlay button.
You can preview the result of the point-pair alignment described above using the overlay mode.
You can also refine the alignment in this mode, by following the steps below:
-
Click the Area to set the anchor point.
-
Click and drag that anchor point to move the area around.
-
Click and drag away from the anchor point to rotate the area.
-
To resize the area to the size of the point cloud: Set a second anchor point, then click and hold one of the anchor points to resize the area.
You can zoom in and out using the mouse wheel to check the alignment.
To remove the anchor point, right-click it.
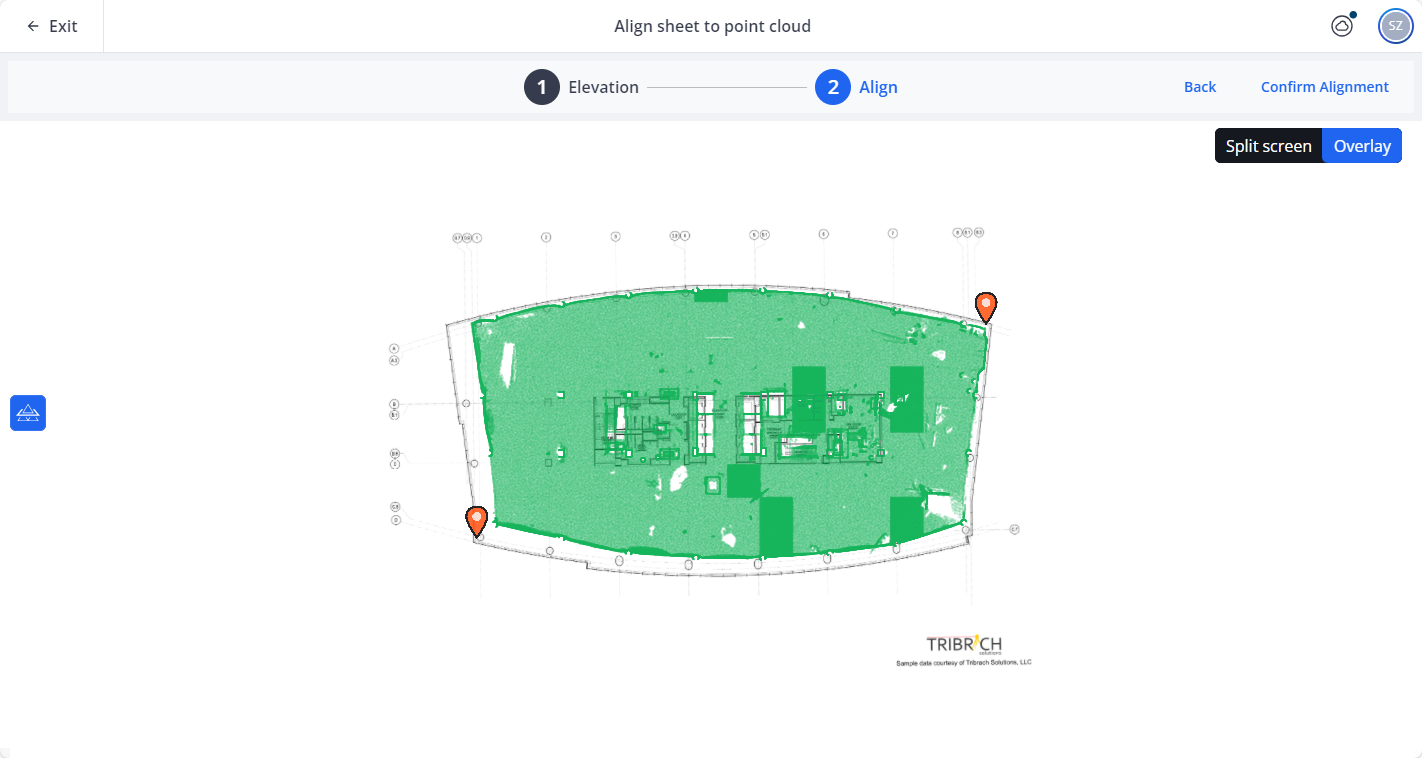
Figure 1-133 Adjust the alignment in overlay mode
Confirm Alignment
If you want to make more changes to the elevation or the alignment, click the Back button in the top right corner of the screen.
When you are satisfied with the elevation and alignment, click Confirm Alignment in the top right corner of the screen.
You are redirected to the Sphere XG Viewer.
Check Alignment and Elevation
-
Click icon
 in the view toolbar on the lower left side of the point cloud to go to the 3D view.
 -
Rotate and drag the point cloud to check whether the alignment and elevation compared to the area are satisfactory.
Otherwise, you can repeat the procedure as described above.
Make the Sheet of the Area Visible in 3D Model
If you want to do an alignment check later in the Sphere XG Viewer, you can do so by decreasing the point cloud opacity to make the area visible again, see also Make Sheet, 3D Model or Point Cloud Visible in Your Project.
