Run a Point Cloud Analysis
The flatness and levelness of floors and ceilings, as well as plumbness of walls or any other surfaces can easily be evaluated and visualized using this new point cloud analysis tool.
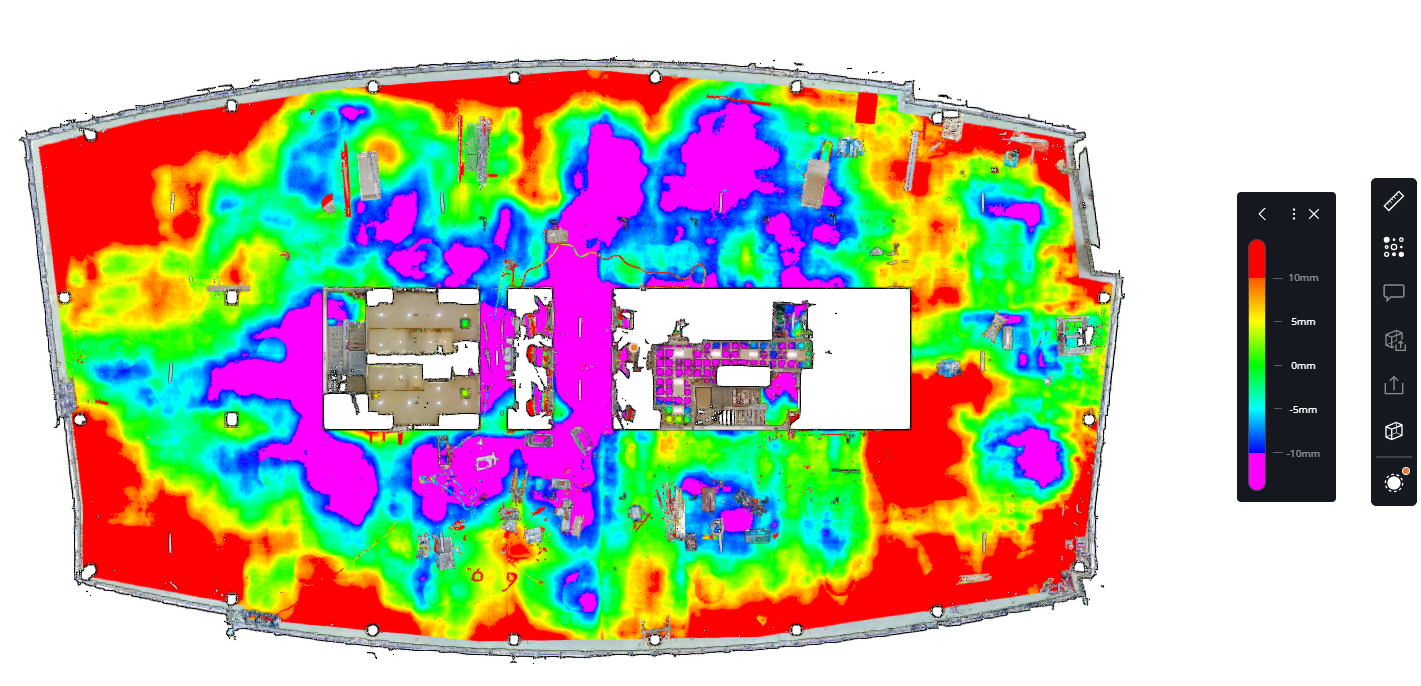
Figure 1-144 Point cloud analysis with collapsed analysis toolbar
To create an analysis:
-
Click the
 icon in the toolbar on the right side when a point cloud is active in the scene.
The cursor changes to crosshairs.
-
Click to create a polygon of the area you want to analyze.
This initiates the analysis. -
Optional: make further settings in the analysis toolbar, see explanations below.
-
To save the analysis in the project permanently, click the
 icon in the analysis toolbar.
Note that you need at least the Project Editor role to save the point cloud analysis.
When you close the toolbar, the analysis is no longer displayed on the point cloud. You can display it by clicking the ![]() icon in the point cloud. You can also show and hide the analysis in the, see General View Settings.
icon in the point cloud. You can also show and hide the analysis in the, see General View Settings.
Settings in the Analysis Toolbar
You can make further settings in the analysis toolbar. ![]() icon for an existing analysis.
icon for an existing analysis.

Figure 1-145 Expanded point cloud analysis toolbar
 Defines how the reference plane will be displayed.
-
Flatness: The reference plane is the best fit of the selected points without any constraint. Use this parameter to evaluate how flat the plane is regardless of its orientation.
-
Level: The reference plane is always level/horizontal. Use this parameter to evaluate the flatness of the analyzed plane in the point cloud compared to the reference plane.
-
Elevation: The reference plane is always horizontal. Use this parameter to evaluate the elevation of points of the analyzed area in the point cloud. If you select this reference plane orientation, you can also change the elevation of the reference plane.
-
Plumb: The reference plane is always plumb/vertical. Use this parameter to evaluate how plumb or vertical the analyzed plane in the point cloud is. The reference plane is set by the best fit of the selected points with a vertical constraint.
-
Volume: Selecting this option enables more settings for the volume analysis, see Run a Volume Analysis.
 Reference Plane: Clicking the eye
 ![]() icon will show or hide the reference plane. You can set the reference plane orientation by selecting which points you want to compare to the reference plane, see above.
icon will show or hide the reference plane. You can set the reference plane orientation by selecting which points you want to compare to the reference plane, see above.
 Color scale: The color scale compares the points with a reference plane. Then it colors each point with its deviation to the reference plane.
-
The tolerance defines the transitions on the color scale. The points deviation values are mapped accordingly.
-
The range determines how far from the plane the points can be while still being affected by the analysis colorization. In other words, only points inside the range will be colored.
