Set the Scale of an Area
|
1238888 |
When you upload an area, you upload a document with a 2D image, i.e. a sheet in Sphere XG terms. The area is in the first place a spatial container of data but it is visually represented by the uploaded sheet. You can set the scale of the area so that you can define which length on the area corresponds to which length in real life. Areas which are created from uploaded data, for example from CAD files, are already scaled correctly.
-
Click the three-dots icon
 of the area to open the dropdown menu.
 -
Select menu item
 Set Area Scale.
The mouse pointer changes to crosshairs. -
Click two points in the area.
These points might be located vertically, horizontally or diagonally. Holding the Shift key will snap the line horizontally or vertically.
After you have clicked the second point, the popup Enter the real-world distance of the line is shown.
-
From the dropdown list, select the measurement unit you want (metric and imperial units are available).
If you have set a default unit in the user account settings, this unit is selected as default. -
Enter the real-world distance.
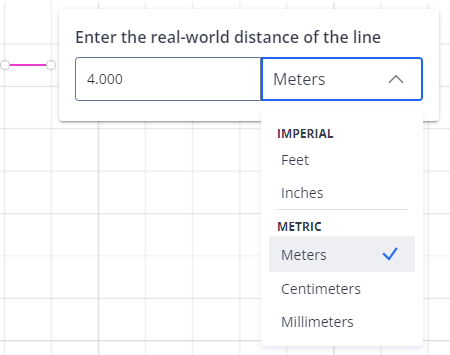
Figure 1-86 Set scale of the area
-
Click outside the popup to close it and confirm your entries.
-
Click the Apply Changes button in the top right corner of the screen to apply the scale and to return to the Sphere XG Viewer.
You can edit or delete a scale later
Edit or Delete a Scale
After you have set the scale and closed popup Enter the real-world distance of the line, the Edit and Delete options are displayed.
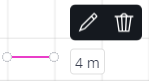
Figure 1-87 Edit or delete a scale
Clicking icon Edit ![]() opens popup Enter the real-world distance of the line again.
opens popup Enter the real-world distance of the line again.
Clicking Delete ![]() , removes the real-world distance you have entered.
, removes the real-world distance you have entered.
