Create new Waypoints
|
1238888 |
There are several ways to create new waypoints.
You can:
-
Set a location marker as waypoint placeholder for 360° photos and 2D photos.
-
Upload a 360° photo to create a waypoint.
-
Upload a 2D photo to create a waypoint.
Adding photos adds visual support and documents progress which may be helpful to identify critical points in a project.
Create Location Marker
You can use location markers to mark positions in a 2D view where a 360° photo should be added.
-
Click the
 icon in the toolbar on the right side.
The icon turns blue. You can also right-click in the 2D view and then select Add location marker from the context menu. -
In the toolbar at the bottom, click the
 icon.
icon.

Figure 1-164 Edit waypoints toolbar
-
Click the location in the 2D view, where you want to place the location marker.
-
Click the Apply changes button in the toolbar to add the location marker.
The location marker is displayed with the ![]() icon.
icon.
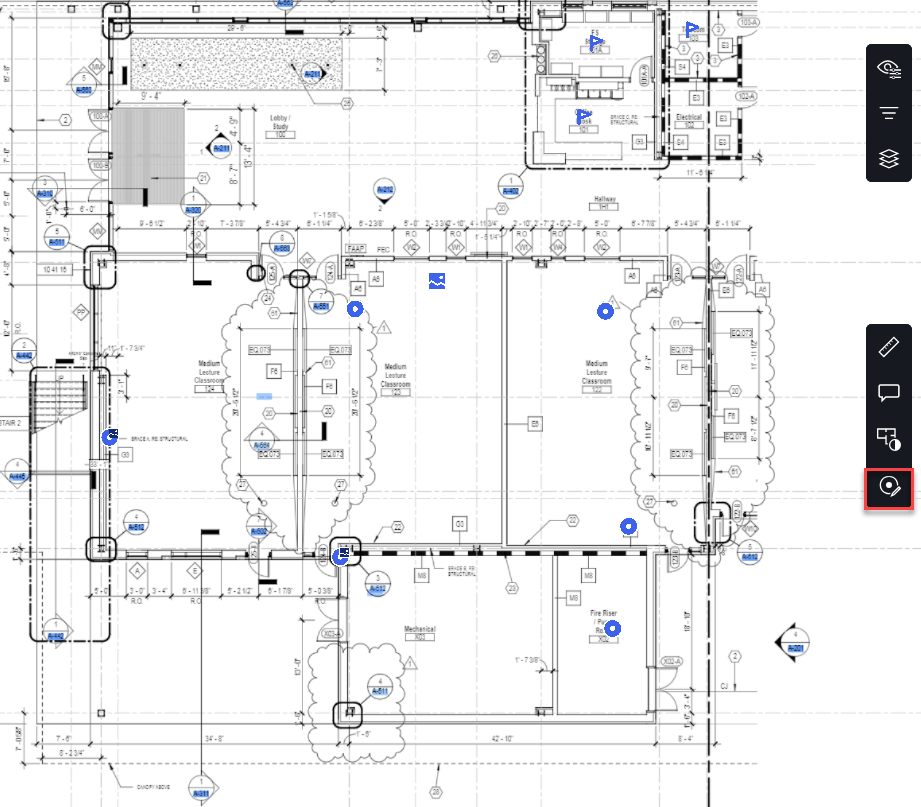
Figure 1-165 Edit waypoints in the 2D view
You can also move a location marker with or without a 360° photo to another area, see Move Waypoints to another Area.
Upload 360° Photo or 2D Photo
You can upload one or more 360° photos or 2D photos to create a new waypoint. Note that you can also combine these two photo types on one waypoint.
-
Right-click the position in the 2D view where you want to add a new waypoint.
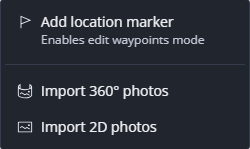
Figure 1-166 Add waypoints
-
Select entry Import 360° photos or Import 2D photos from the context menu.
-
Select the photos you want from the file system and confirm.
The photo(s) will be uploaded. You can also drag and drop photos onto the 2D view to create a new waypoint.
You can add more photos later by right-clicking the photo in the project structure view and selecting the Add data entry or dropping more photos onto the waypoint, see Add 360° Photos or 2D Photos to a Waypoint or Location Marker.
