 Place Animation Camera
You can use FARO Zone 3D as a movie studio to create thorough re-enactments of events. You can place multiple cameras, play your animation from any angle, and adjust speeds. Record final animations in .mp4 format and use a 3rd party video recording system to stitch them together.

For more information, see Placing Animation Cameras.
To place a camera:
-
From the Animation ribbon, click Place Camera.
-
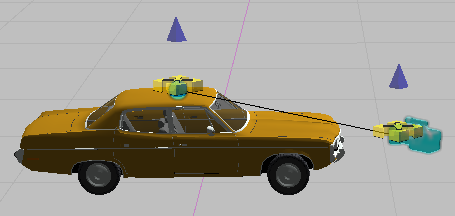
Click a placement point in the diagram, move the cursor in the direction to point the camera and then click again.
-
Configure options in the Animation Camera tool panel.
-
Test the animation by clicking the play command in the lower-right corner. You may also scrub over the timeline with the slider at the bottom of the screen.
Animation Camera Tool Panel
| Camera Color | Choose the color of the camera from the color palette. |
| Layer Manager | Open the Layer Manager to choose the layer for the object. |
| Preview | View the diagram from the camera’s view. |
| Save Panoramic 360 Image | Save a 360 image from the camera’s perspective. |
| Active | Activate or deactivate the camera. |
| Lock Camera View | Enable the Lock Camera View. Turn off this option, or press the Esc key twice to unlock the camera view. |
| Name | Use the default name for the camera, or enter a new name. For example, you can name the camera based on it’s position in the diagram. |
| Type |
You can configure camera types and behaviors for the areas which the cameras target. Stationary Camera - Captures a scene from a standing position. The camera does not move other than to swivel depending on the target type. This might be the point-of-view (POV) of a witness or for a birds-eye view of the scene. Following Camera - Attaches to an animated symbol, such as a car or person. This might be the POV of a driver or passenger in a car or a POV of a moving witness. Animated Camera - "Floats" as it moves along its own animation path. Use this camera type for a roving birds-eye view of the scene. Stationary Target - Remains in one position. It could be used for an area with animations moving through it, or to demonstrate what a moving witness might see when looking at a stationary target. Following Target - Follows an animated symbol. Drag the orientation circle on top of the symbol to follow it. This might be a witness watching a target, or an animated camera following a target. Animated Target - Allows for viewing multiple targets, giving the target its own animated path. |
| X, Y, Elevation | Adjust the position of the camera. |
| View Angle | Adjust the view angle of the camera to match a real-world field of view. |
