 Draw Wall
To draw a wall:
-
From the Power Tools ribbon, click the Walls drop down arrow to view available tools.
-
Click the Draw Wall.
-
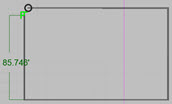
In the diagram, click the start point, and then click each corner of the structure. If snaps are on, click the start point to close the structure. If snaps are off, or if you do not close the structure, double-click to add the wall.
When drawing walls at right angles, notice the perpendicular snap command that displays when the wall is drawn 90 degrees to the previous wall. Turn on Ortho-Lock to draw perfect right angles.
-
-
Use the grips to make adjustments, or configure the object in the tools panel.
Wall Tool Panel
 Line Type Line Type
|
Select the color from the color palette. |
 Layer Layer
|
Open the Layer Manager, from which you can choose an existing layer, or add a new layer for the object. |
 Wall Projection Wall Projection
|
Place a 2D image on a wall. See Wall Projection |
| Reference Side | Select the side of the wall on which to apply offset wall thickness. |
| Thickness | Adjust the thickness of the wall. |
| Wall Height | Adjust the height of the wall. |
| Elevation | Adjust the elevation of the structure. |
| Closed | Connect the starting wall with the ending wall. |
|
Color + Materials |
From the Enhanced Material (PBR) panel, choose material texture and add color to either side of the wall. See PBR Materials |
| Show Points | Click to open the points panel, where you can adjust X, Y coordinates of the endpoints, and the Length and Angle of each wall segment. Click Back to close. |
