Get and Mark the Coordinates of a Location
|
1238888 |
You can get and mark coordinates of a location in any point cloud, 3D model and 360° photo with depth information. However, to get meaningful coordinates, your captures should meet the following prerequisites:
-
A point cloud should have a valid coordinate system, i.e. it was either registered to survey points in SCENE, aligned to a 3D model in Sphere XG, or if Blink scans were processed and registered in Sphere XG.
-
A 3D model should have a valid coordinate system.
-
A 360° photo should have orientation information in addition to the depth information.
In addition, you can get and copy the location of an annotation or a measurement. For more information, see Create and Manage Annotations and Make Measurements in a Project.
Get and Copy the Coordinates of a Location
-
Right-click the position for which you want to get the coordinates.
-
Select the coordinates from the context menu.
The coordinates are copied to the clipboard. The location is not marked.
Place a Pin and Copy the Coordinates
If you place a pin, the position will be marked with a pin icon in all views for the current browser session allowing you to compare a specific location in different views, see also figure below. You can also copy the pin's coordinates. Note that pins are not saved permanently.
Place Pin
-
Right-click the position where you want to place the pin.
-
Select Place pin from the context menu.
OR
Press and hold the Shift key and right-click the position you want.
The location is marked with a ![]() icon.
icon.
Get the Pin Coordinates
-
Click the pin.
-
Select the coordinates from the context menu.
The coordinates are copied to the clipboard.
Delete Pin
-
Click the pin.
-
Click the
 icon in the context menu.
Note that the pin is deleted without further notice.
Examples
|
|
|
|
Figure 1-149 Pin in 3D model |
Figure 1-150 Pin in 2D view |
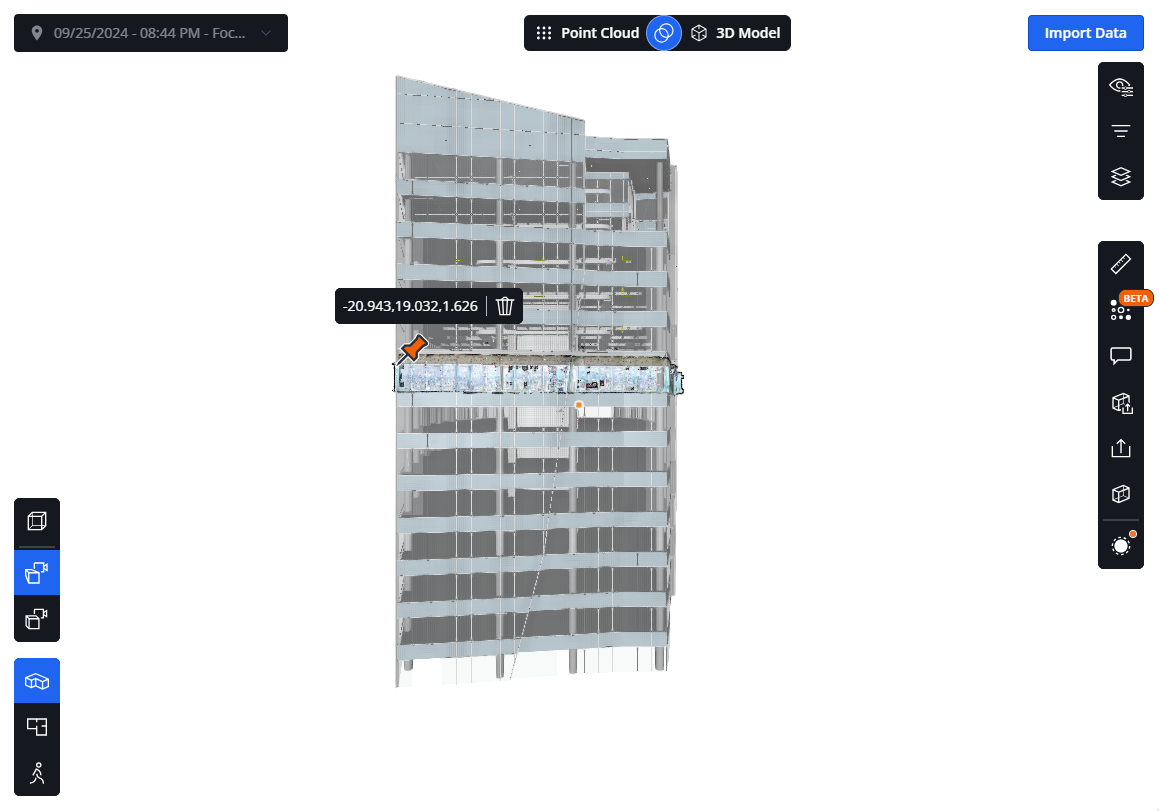
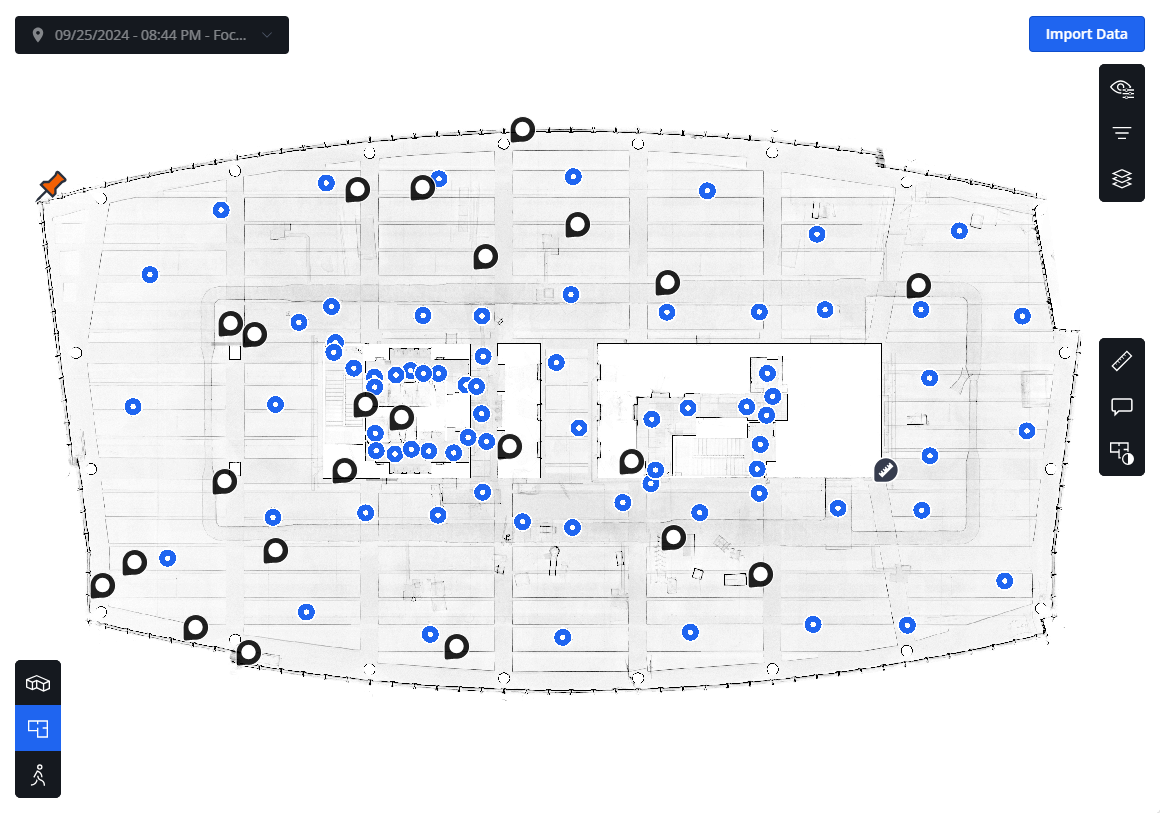
The above figure shows the same pin in an overlay of a point cloud and a 2D view.
Another use case is placing a pin in a 360° photo with depth information and then following this pin as you move from 360° photo to 360° photo.
