Upload, Process and Register Scans
|
1238888 |
This workflow is available for Blink, Orbis and Focus scans. You can use all scan types in one project.
The Focus workflow is currently in beta state.
There are two options for uploading scans to Sphere XG and starting the workflow, i.e. pre-register and upload via Stream or upload manually.
The changes during upload, processing and registration are made on a draft project. Scans and changes are not available in the Sphere XG Viewer until they are published.
Starting from SCENE 2025.2, projects registered in SCENE will be displayed as registered in Sphere XG and vice versa.
Pre-registration and Upload to Sphere XG via Stream
See:
-
Your First Scan Project in the Blink user manual.
-
Stream Workflow with the Orbis in the Orbis user manual.
-
Stream Workflow with a Focus Scanner in the Focus user manual.
After pre-registering the scans in Stream and uploading them to Sphere XG, they will be processed and registered automatically.
The better the pre-registration in Stream, the better your registration results will turn out, but you can also edit and improve the registration result manually in Sphere XG.
Manual Upload to Sphere XG
You can also upload scans manually as follows:
-
On the Sphere XG Dashboard, go to the Projects page.
-
Select an existing project or create a new one.
-
If you create a new project, upload scans as explained under Bring Your Data into the Cloud.
OR
-
If you want to import data into an existing project, choose one of the following options to import scans:
-
Click Draft at the top of the viewer to open the project draft view and click the
 icon.
icon. -
Click the Edit scans button in the project structure view to open the project draft view and click the
icon . -
Click the Import button in the project structure view and click the Scans tile.
Then select the scans from the file system. The following page will be displayed
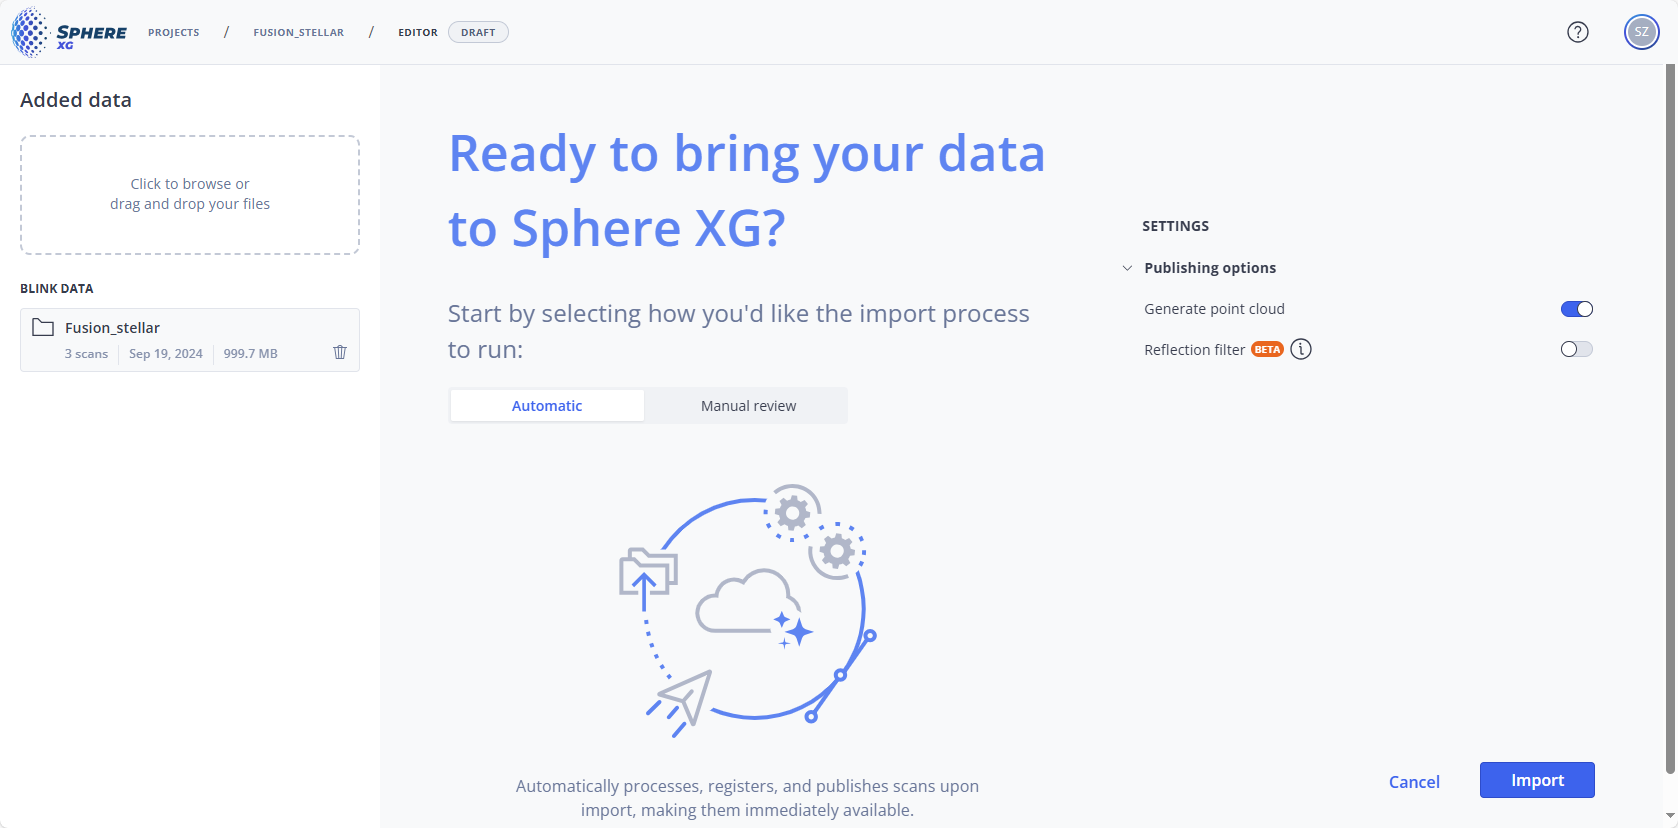
Figure 1-88 Define upload and registration settings
-
Optional: Add more data to the project by clicking into the Added data field.
Workflow type and Publishing options
-
Select the Workflow type.
-
Automatic: If you select this option, the project will be published automatically if the workflow finishes without issues.
-
Manual review: When the registration has finished successfully, you will be prompted to inspect the project in the draft view and then publish manually.
-
-
Select the Publishing options, see Upload, Process and Register Scans below.
-
Click Import.
The automatic workflow will start.
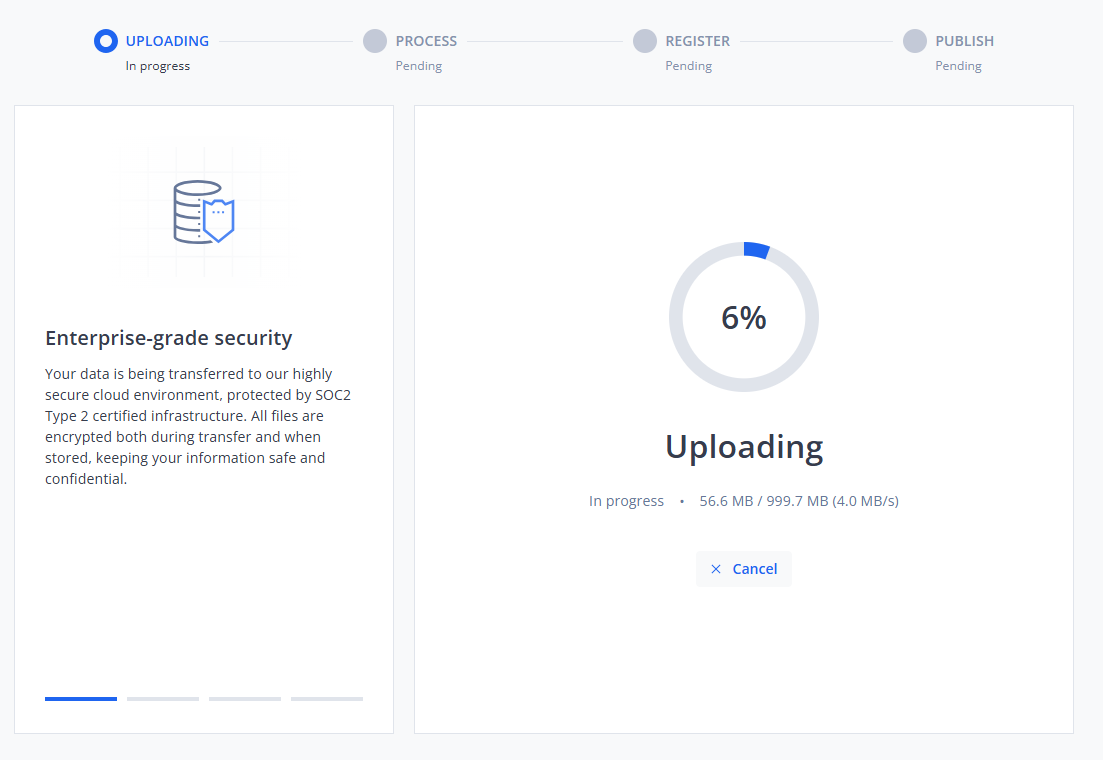
Figure 1-89 Blink workflow in progress
The workflow has the following steps:
-
Uploading: The scans will be uploaded to the cloud.
-
Process: The scans will be processed, i.e. scan point clouds will be created and various other settings regarding the offset, colorization and filtering will be made.
-
Register: The scan point clouds will be registered, i.e. the pre-registration results will be refined and improved.
-
Publish: If you have marked the Generate point cloud checkbox , all scan point clouds will be merged into a project point cloud. If all previous steps have finished successfully and you have selected the Automatic workflow type, the project will be published automatically and you can access it in the Sphere XG Viewer, see below. However, you can still change and re-publish the registration. If you have selected the Manual review workflow type, you will be prompted to check the registration result in the Registration - Inspect view before publishing. In this view, you can also edit the registration
During each workflow step, the progress and status are displayed, see figure above.
If the publishing process finishes successfully, you will get a notification in Sphere XG and via email. If you have selected Manual review, you will be prompted to review the project in the draft view before publishing.
You can revisit and change the registration at any time. See Edit Project Registration in the Draft View for more information.
Processing and Publishing Options
The following settings are available for Blink, Focus and Orbis scans:
Generate point cloud
If you enable this switch, all scans will be merged into a point cloud before publishing.
Otherwise, only the overview map with registered scans and 360° photos will be published. Note that 3D data will not be available.
Reflection filter (beta)
If you enable this switch, reflections caused by reflective surfaces will be filtered out.
This may increase processing time. It is recommended to disable the filter if there are no reflective surfaces. Note that this feature is still in beta state.
For the Orbis scanner, the following additional processing options are available:
Capture environment
Select a processing type with information about the environment where the scan was made. This can aid the processing quality.
-
Confined: An environment where the system will be exposed to surfaces at a maximum 1.5m from the scanners trajectory. To be used in a tight indoor environment or if temporarily moving through a tight space.
-
Forest: Dense forest environment where irregular features occur on all 6 sides of the scanner (left, right, top, bottom, front, back). The start and finish position are the same.
-
Indoor: Indoor environments where features are usually planar on all sides of the sensor and maximum range rarely exceeds 30m.
-
Open Loop: Various environment where the start and finish positions are not the same. To be used in linear scans where capture does not exceed 20 - 25 minutes.
-
Standard: The default setting for a feature-rich environment. Feature-rich environments are those where unique objects/ surfaces surround the system on 5 sides (front, back, left, right, bottom). These objects/surfaces should be at maximum 40m from the system.
-
Tunnel: A feature-poor environment where the system is surrounded by irregular surfaces on 4 sides (left, right, top, bottom). These surfaces should be at maximum 25m from the system.
-
UAV: Airborne missions taken by a drone where features are no more than 40m from the sensor. Bounding box has been modified to remove UAV system from the processing data. This setting removes the drone rotor blades from the capture. Currently, UAV is not possible with Orbis, you can only use ZEB Horizon without Vision.
-
Vehicle: Environment where the vehicle is moving at no more than 30 mph (48 km/h). The start and finish positions should be approximately in the same place (some 2-3m). Features vary in distance from the trajectory.
Colorization
If you activate this switch, the camera photos that are available in the scan are evaluated and used to colorize the mobile data.
Remove transient points
If you activate this switch, moving objects will be removed from the point cloud.
Detect and exclude outliers
If you activate this switch, outlying data points will be removed from the point cloud with the improved outlier filter. Outlying points may be caused by rain or dust or by partial reflections from edges.
Noise reduction
If you activate this switch, the point cloud is improved by reducing surface irregularity/noise and removing outlying data points.
