Inspect the Registration of Scans
|
1238888 |
You can check the automatic registration of scans and then edit the registration to improve the output or fix issues.
-
You can inspect the registration, if uploading, processing and registering scans finishes successfully, but you want to improve the registration result. However, this is not required. If you want to inspect the registration, click the
 icon on the project draft page.
 -
You must inspect the registration, if uploading, processing and registering scans finishes with issues. This is usually due to a failure in registration, i.e. one or more scans could not be connected. You will be notified by an error message in Sphere XG and via email. In this case, you can either click the Adjust registration button on the error notification page, or you can go back to the project draft page and click the
icon. The icon will contain a red dot signaling a registration issue.
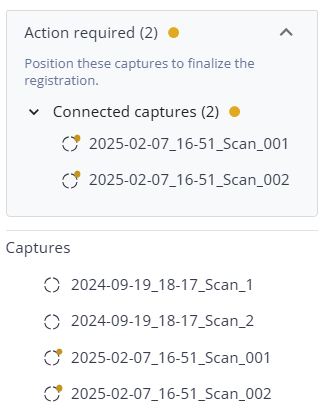
Any open issues will also be displayed in a separate section in the project structure view. The colors correspond to the colors in the registration report, see View the Registration Report below.
Clicking the![]() icon in the project draft view table will open the Draft view in the Sphere XG Viewer.
icon in the project draft view table will open the Draft view in the Sphere XG Viewer.
In the draft view, you can inspect the current registration. Changes to the registration itself are not possible, but you can delete scans and import scans if required. If you want to change the registration, click the Edit registration button at the top right. See Edit the Registration of Scans for more information.
The Registration - Inspect page provides various options to view the registered scans and connections, see below.
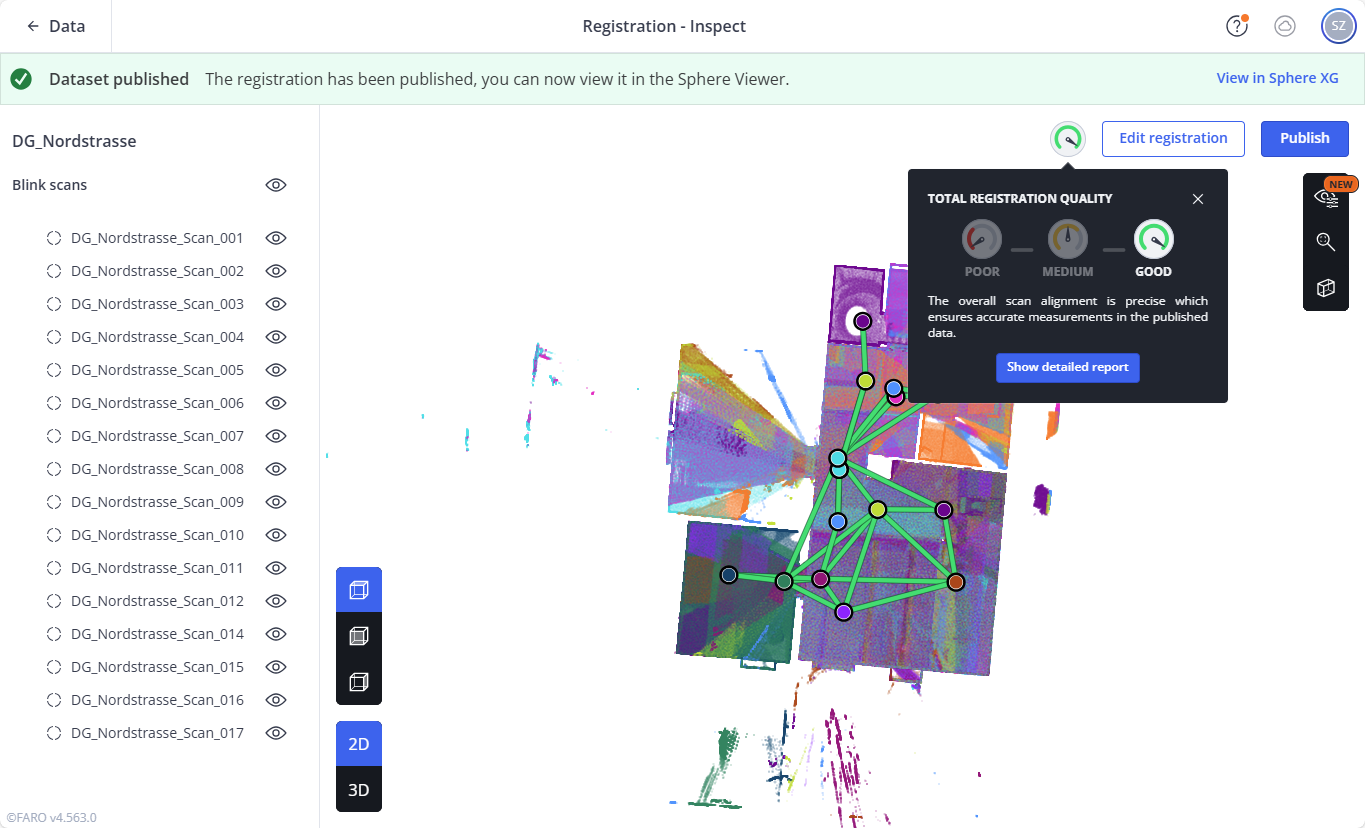
Figure 1-90 Inspect registration page
When do you need to inspect the registration?
You can quickly switch between the project draft on the project draft page and the live project by clicking the Live and Draft toggles in the breadcrumbs.
View the Registration Report
The overall result of the registration is displayed by the following indicators:
 Good registration quality, i.e. the scan alignment is precise. In this case, you can publish the project.
 Medium registration quality. You should inspect the registration and maybe edit it.
 Poor registration quality. The scan alignment has significant issues and you should edit and then repeat the registration.
Clicking one of these indicators opens a quality report summary. For a detailed report, click the Show detailed report button.
The quality report is opened. See explanations directly on the quality report page for further information. Hovering the mouse pointer over a connection highlights the connection and the connected scans.
Clicking a connection opens a detail page with information about the connection.
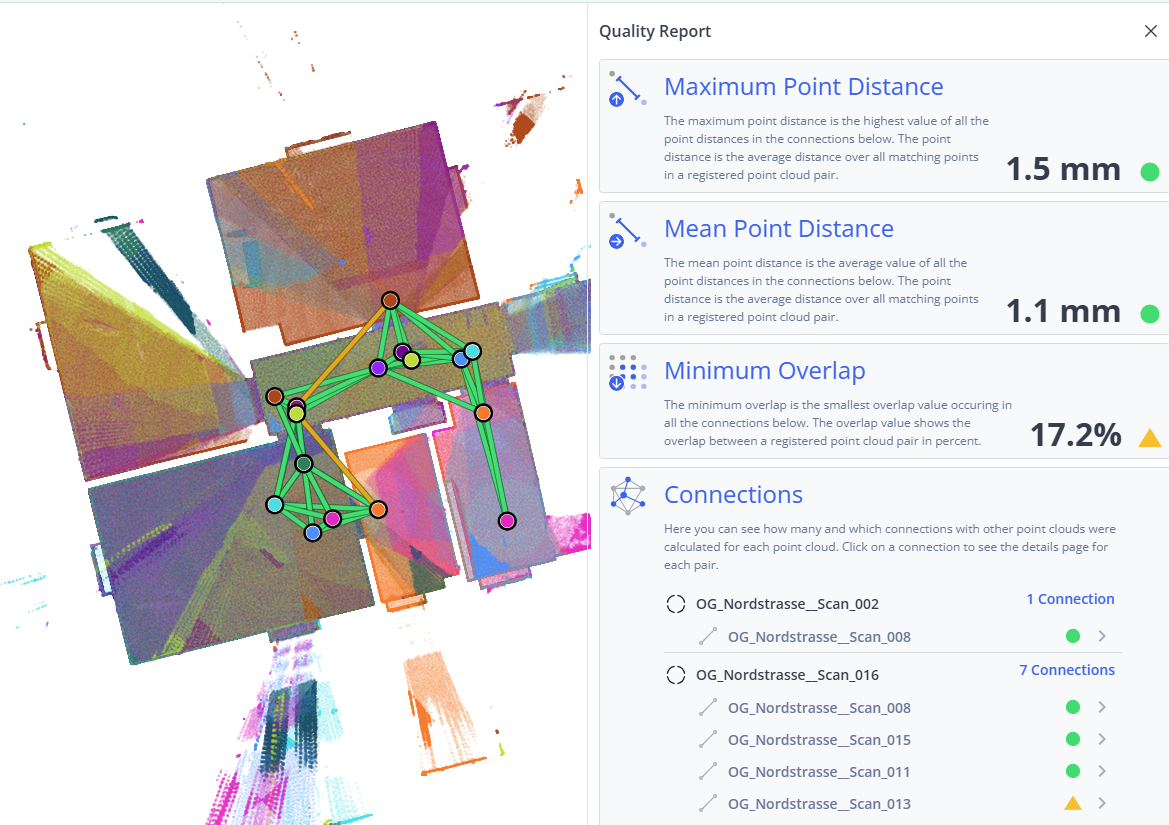
Figure 1-91 Quality report with medium registration quality
Registration Views
On the right side of the screen, you can switch between 2D and 3D view.
|
|
|
|
Figure 1-92 2D view |
Figure 1-93 3D view |


-
In the 2D view, you can click one of the icons to select the top, front or right side view. Click and hold a point in your project to move it to the left, right, up and down
-
In the 3D view, you can switch between the orthographic and the perspective camera, see also explanations under 3D View Toolbar. Left-click and hold a point of the project to rotate the project around this point. Right-click a point in the project to move the project to the left, right, up and down.
Registration View Settings
You can adjust various view settings to help identify scans and connections.
Click the ![]() icon in the toolbar on the right side.
icon in the toolbar on the right side.
The following options are available:
Color mode
-
Color by capture: Each scan gets an individual color to distinguish it from the other scans.
-
Original color: The scans are displayed in their original color to provide a first impression of the original capture colors (without color balancing).
Scan markers
-
Show all: All scan markers are displayed.
-
Show only for visible captures: Only the markers of visible scans are displayed. Markers of scans that are hidden below connections and other scan markers are not displayed.
-
Hide all: All scan markers are hidden.
Registration connections
-
Show connection lines: Shows or hides the connection between scans.
-
Quality color coding: If this switch is activated, the connections are colored based on the registration quality, i.e. green for good quality, yellow for medium quality and red for poor quality. If this switch is deactivated, the connection lines are displayed gray.
Recenter View
Click the
 icon to recenter the view.
Create a Clipping Box
Click the
 icon to create a temporary clipping box.
 You can resize and rotate the clipping box as described in Rotate and Resize the Clipping Box Manually.
To reset the clipping box to its original state, click the
 icon.
icon.Click the
icon again to remove the clipping box. Import Scans
Click the Import scans button in the project structure view. See Import Scans into Your Project for more information.
Select and Delete Scans (Captures)
If you select one or more scans in the Viewer, another toolbar is displayed at the bottom showing the number of selected scans and the following options.
 Hides or shows the selected scans. You can also hide and show single scans in the project structure view.
  If you have selected a scan, clicking this icon selects all connected scans.
  Centers on the selected scans.
 Deletes the selected scans. Note that you cannot undo the deletion.
  Clears the selection. Note that this option does not show scans that were hidden. Click the
  icon of these scans in the project structure view to show them again.
