Creating a Point Cloud from a Video
You can use the FotoPoints tool to convert video from your mobile device to a point cloud.
-
Take video with your mobile phone.
-
Download the video from your mobile phone.
-
Start a new project in FARO Zone 3D.
-
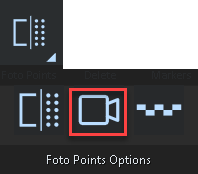
From the Point Cloud ribbon, click FotoPoints and select the Videogrammetry option. The FotoPoints: Videogrammetry panel opens.
-
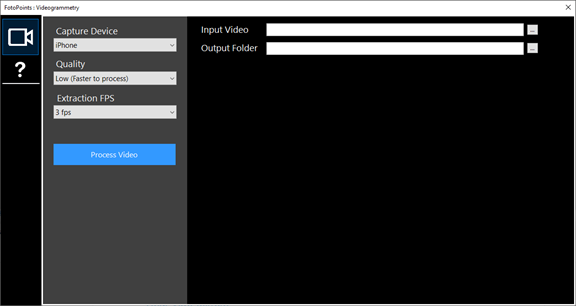
From the Input Video field, select the video file (.mp4 or *.mov).
-
From the Output Folder field, select the destination folder for the resulting .lsproj (point cloud) file. The output folder must be empty. If the folder contains data, the software creates a subfolder.
-
Click the Capture Device dropdown. Select the model of your mobile phone, or select Custom Device. You can name the device, and you must select a reference photo. Browse to a photo that you uploaded from the phone.
-
From the Quality dropdown, select the quality of the resulting point cloud. Higher quality point clouds take longer to process, and they can result in significantly larger point cloud sizes.
-
From the Extraction FPS dropdown, select the FPS (1-6) to use for creating the point cloud. A setting of 2 or 3 is recommended, but you can experiment with this setting until you achieve the best resulting point cloud from the video.
-
Click Process Video.
-
When the video processing completes, you are prompted to align and scale the point cloud.
FARO FotoPoints requires that your system has a CUDA-compatible NVIDIA GPU. See System Requirements.
For more information on capturing video that works best for this feature, seeFotoPoints Guidelines and Tips.
Use a raw, uncompressed video file downloaded directly from the phone to the computer. Videos sent via email, text messages, or stored on some types of cloud storage are often compressed to save space. Compressed videos will not yield the best results.
For instructions on downloading video from your iPhone, click here.
For instructions on downloading video from other mobile phones, click here.
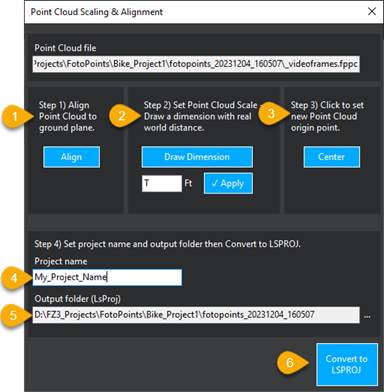
① Click Align to align the point cloud to the ground plane. Click 3 points on the ground plane.
② Click Draw Dimension, draw a dimension line on a known width of an area of the image, and then click Apply.
③ Click Center to set a new point cloud origin point.
④ In the Project name field, enter a name for the project.
⑤ The output folder defaults to the output folder that you previously configured. To change it, select the dropdown and browse to a different folder or create a new folder. The output folder must be empty.
⑥ Click Convert to LSPROJ to create the point cloud.
For more information see:

FAROFotoPoints Guidelines and Tips
