FARO FotoPoints Example Project
This example demonstrates using the FotoPoints tool to convert photos of a chair to a point cloud. You can use the point cloud to draw and dimension the chair for reverse engineering.

|

|

|

|

|

|

|

|

|

|
|

|

|

|
| Take Photos | FARO FotoPoints |
PC Tools/ Positioning |
Clipping Box | PC Snap | Draw | Dimension |


Take pictures of the subject.
See best practices for taking photos here.
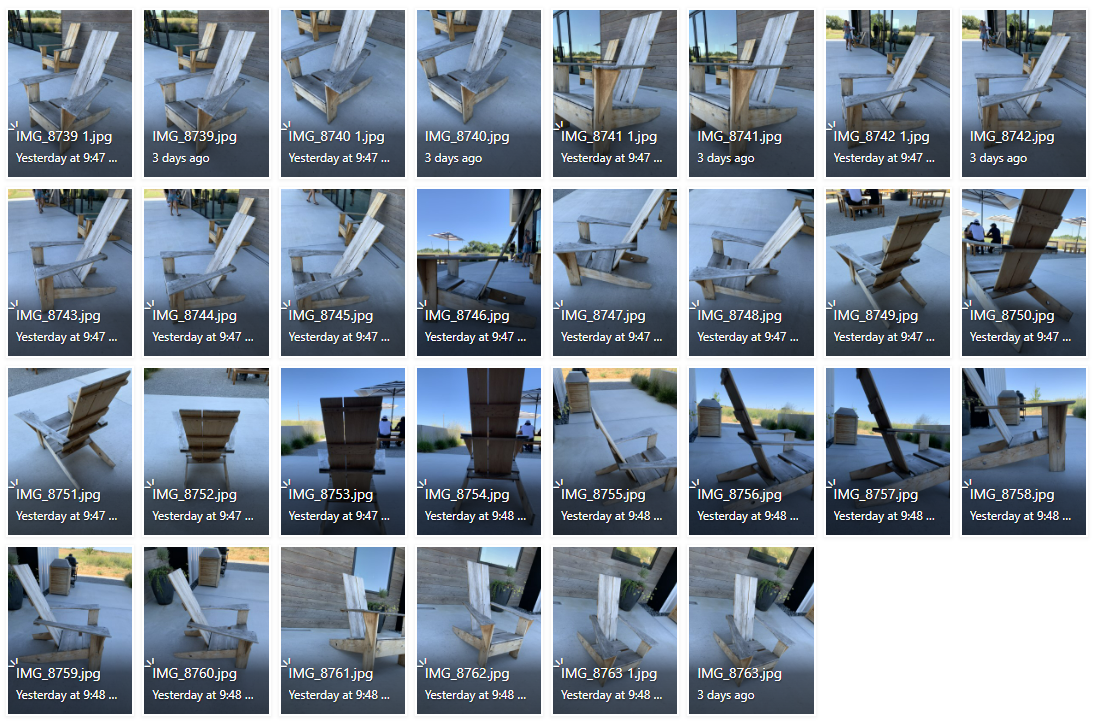


Import the photos with the FotoPoints tool.
From the Point Cloud ribbon, open the FotoPoints tool and import the pictures.
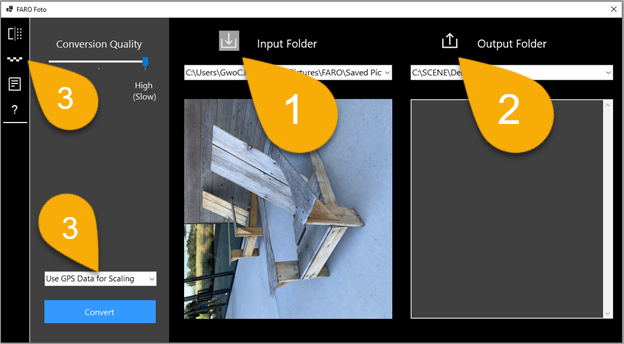
① Click Input Folder to select the folder that contains the images to convert.
② Click Output Folder to choose the .lsproj output folder.
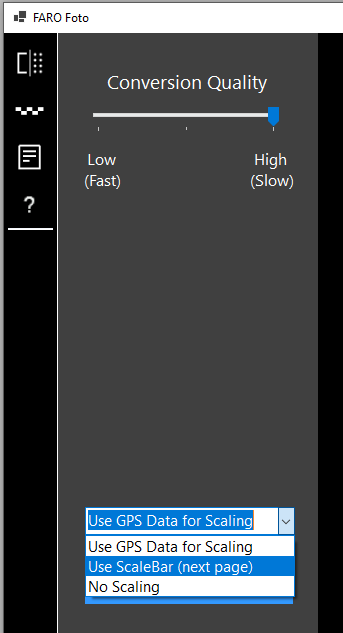
③ From the dropdown menu below the Convert button, select Use Scalebar. You can also click the Scalebar button in the tool tip to switch to the Scalebar page.
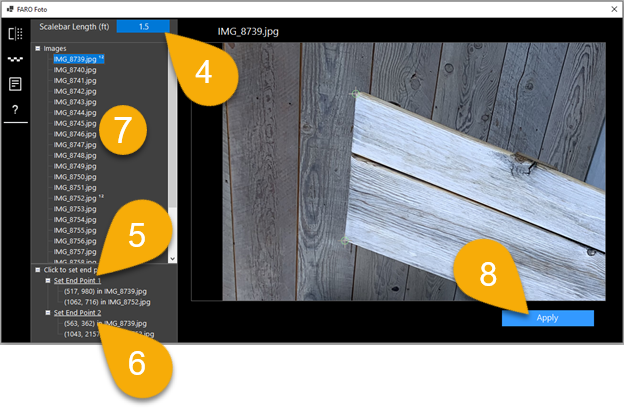
④ In the Scalebar dialog, enter the length of the scalebar. The scalebar should be a part of the object that is easily identifiable in an image, with a known length. In this example, we'll choose the top of chair backboard to be the scalebar. Enter the length in the edit box.
⑤ Choose any image that shows a clear view of the backboard. Click Set End Point 1 and set the first end point in this image. Use the mouse wheel to zoom in, and pan with the right mouse button. You will see the “end point mark” after the end point is set. Click Set End Point 1 if you need to pick a different position.
⑥ Click Set End Point 2 to set the 2nd end point. Note that 2nd end point does not need to be in the same image, so you can choose another image that shows a better view of end point 2.
⑦ Set end points in at least two images. Superscripts are appended after the image name.
If you need to delete a point, select the point in the dropdown, or right-click the point and select Delete.⑧ After you set end points in at least two images, click Apply. This returns you to the Convert page.
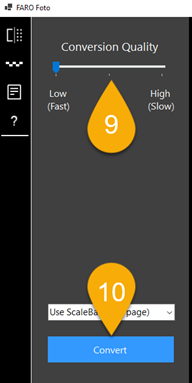
⑨ Choose output point cloud quality
⑩ Click Convert.


Align the point cloud.
Open the Point Cloud Tools ribbon to adjust the point cloud alignment
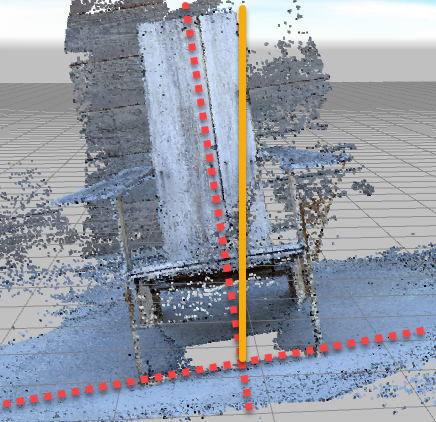
Following the import, you may need to align the point cloud with the ground plane.
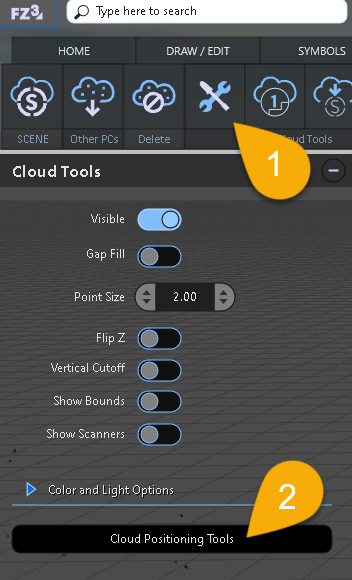
① From the Point Cloud ribbon, select Point Cloud Tools.
② Click Cloud Positioning Tools.
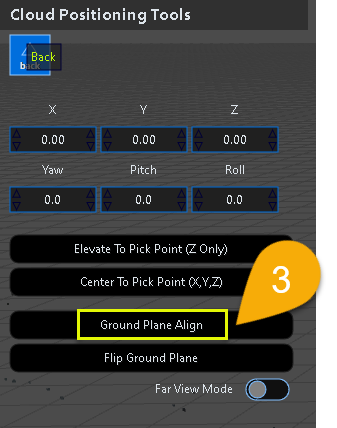
③ Click Ground Plane Align
Click three points on a flat section (floor/ground) to align the point cloud to the ground plane.
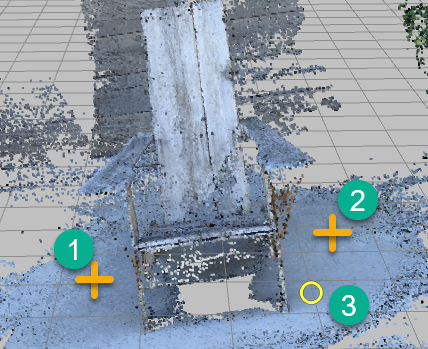
If the adjustment flips the point cloud, from Cloud Positioning Tools, click Flip Ground Plane.
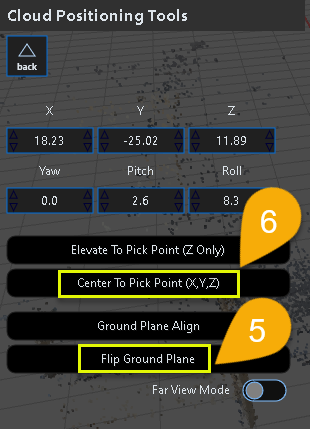
You can center and elevate a point to the 0,0,0 origin.
From Cloud Positioning Tools click Center to Pick Point (X,Y,Z), and then click a point in the point cloud.
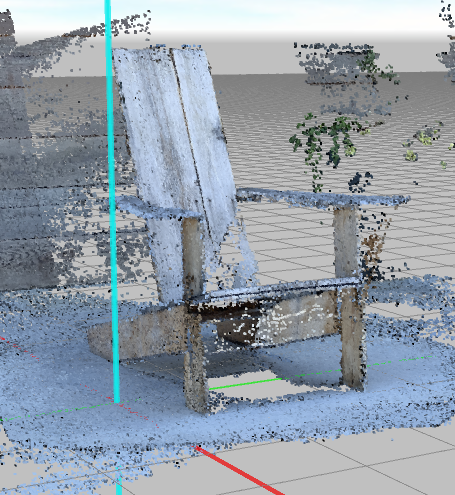


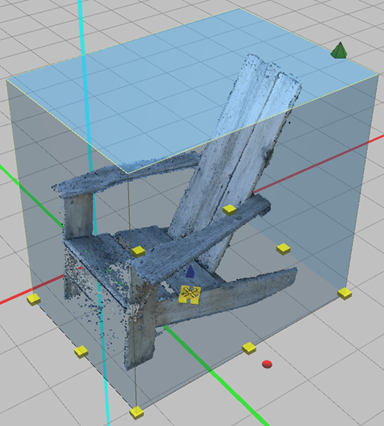
Crop the object with a clipping box.
Isolate the object with a clipping box (see the Clipping Box workflow for more detail.)
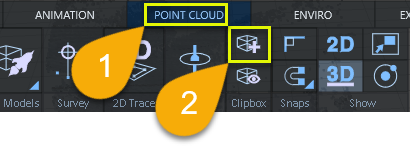
① Click the Point Cloud ribbon.
② Click Create Clipping Box.
Size the clipping box and Hide the Outside
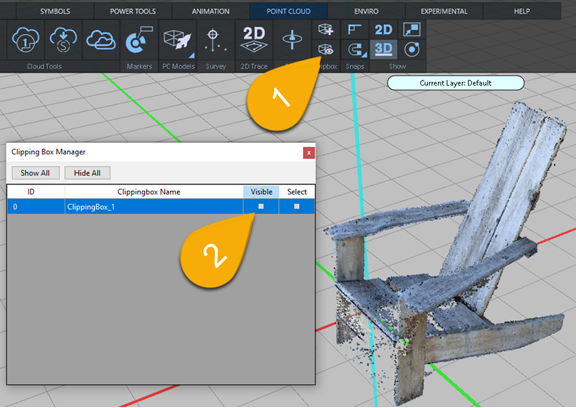
① Open the Clipping Box Manager
② Disable Visible to hide the clipping box.


Snap to the point cloud.
Create a diagram from the point cloud by snapping to the point cloud. Before you begin drawing, make sure Point Cloud Snap is enabled.
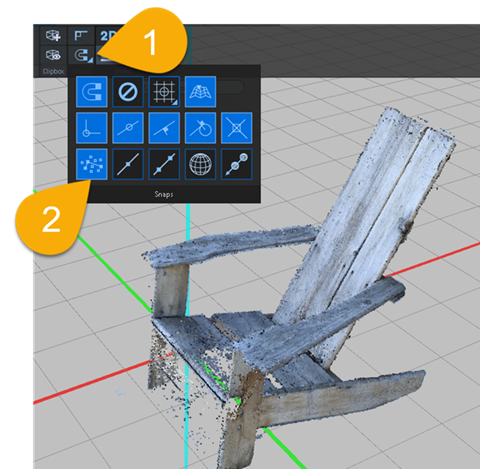
① Open the Snaps menu
② Enable Point Cloud Snap.


Draw line work using the point cloud.
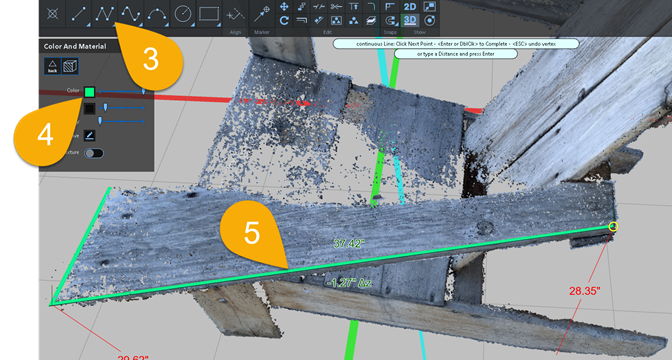
③ Click the Continuous Line tool.
④ You may need to set the line color to a color that contrasts well with the colors on the point cloud.
⑤ Draw the line by snapping to points on the point cloud.
After you draw the line, you can re-select it and adjust the nodes.

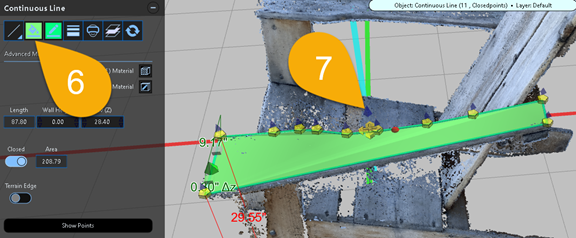
⑥ Close the polygon by connecting the last point to the first point.
⑦ With the polygon selected, set the fill color.
If the point cloud obscures the fill, you can disable the point cloud display, or slightly elevate the polygon using the Elevation Grip.


Dimension the key points.
Enable Point Cloud Snapbefore you dimension.
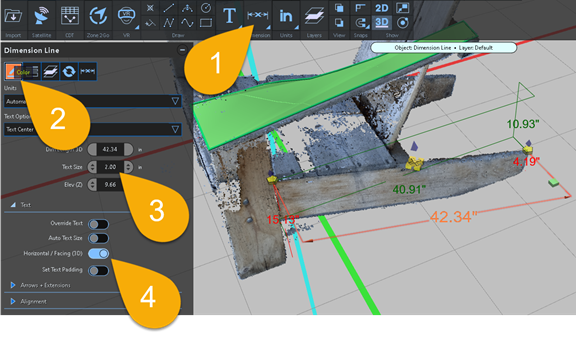
① Click the Dimension tool.
② Change the dimension color to stand out from the point cloud and line work.
③ Set the dimension text size.
④ Set the dimension text to Horizontal Facing so you the dimension text is always facing you when you change your view angle.
You can explore other dimension options and dimension types from the dimension menu.
Take Snapshots or Print from Final Views
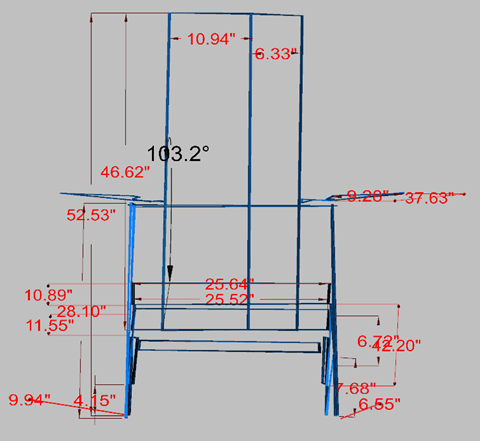
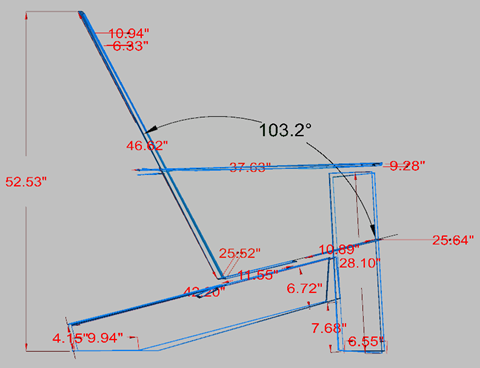
Side and Front
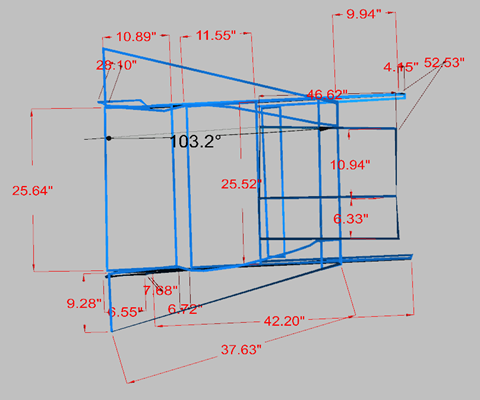
Top and Iso
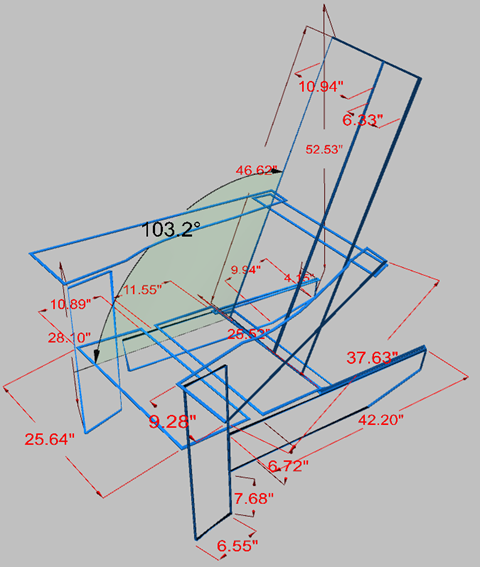
For more information see:
FAROFotoPoints Guidelines and Tips
