Import 2D Plans, Layouts or Schematics as Areas or Layers (Sheets)
|
1238888 |
By default, you must upload a 2D plan, layout or schematic as an area to your project upon project creation. This so-called sheet will then be the first area of your project.
While working with the project, you can add further documents to create more layers or new areas.
-
A project may have more than one area. Areas contains layers and 360° photos. They are shown with icon
 in the project structure view.
 -
A layer is a concept in Sphere XG describing the fact that you can overlay and align sheets, i.e. 2D plans, layouts and schematics. In the views setting toolbar, you can select which layer you want to see. For more information, see Add, Edit or Delete Layers in Existing Projects.
-
Click the Import data button in the project structure view.
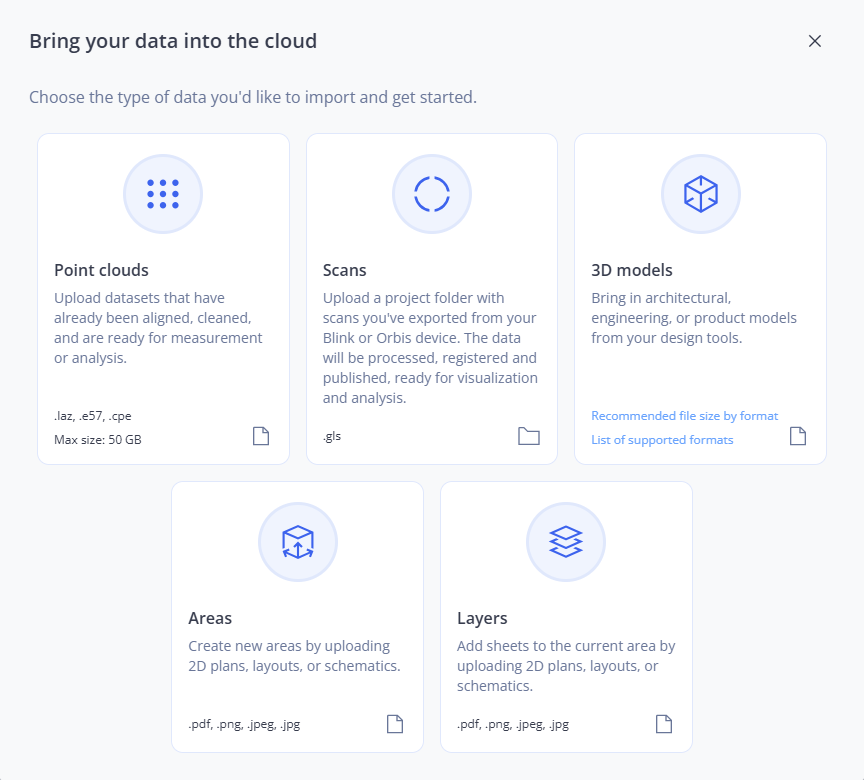
Figure 1-117 Import form
-
Click either the Areas or the sLayer tile.
-
Select the document you want from the file system and confirm or drag the document onto the page.
-
For multi-page sheets (.pdf): Mark the checkbox of the pages that you want to import.
You can also enter the pages you want to import into the selection field. Separate ranges with a hyphen and single pages with a comma.
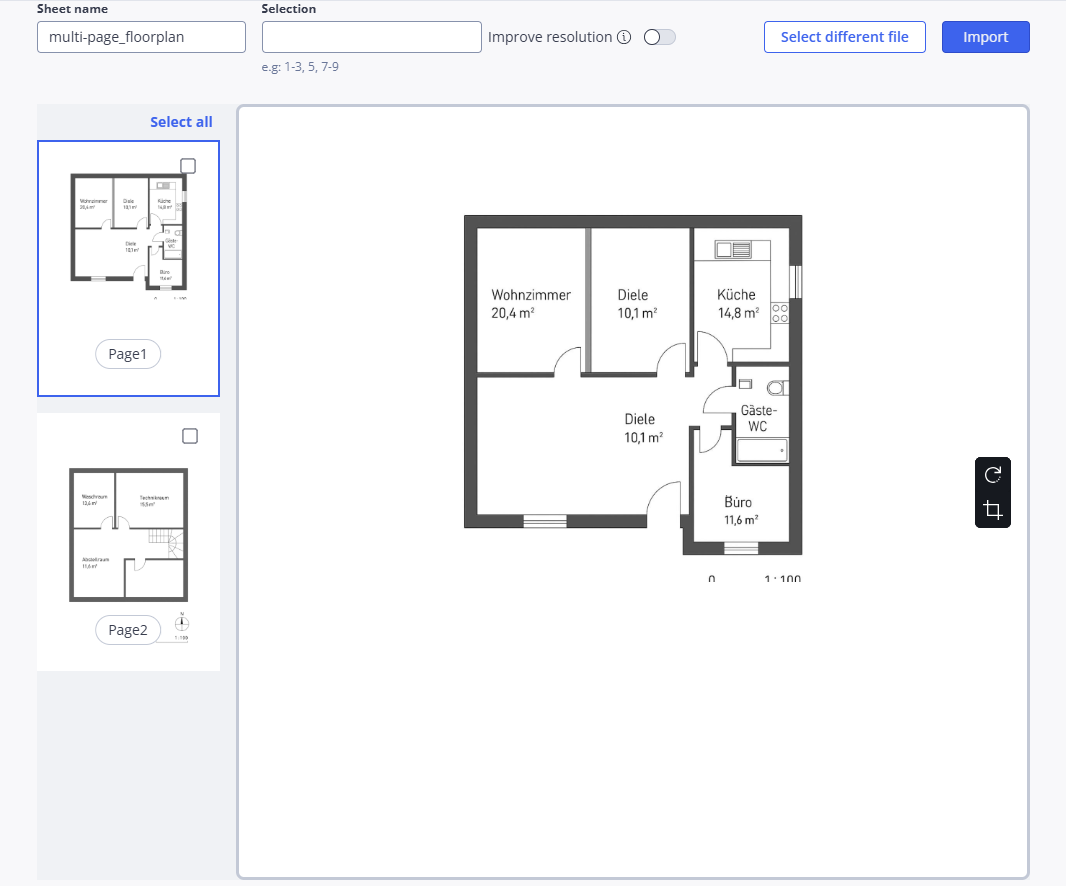
Figure 1-118 Multi-page floorplan handling
-
Click the Import button.
If you are importing a multi-page .pdf file and do not select one or more pages, the first page will be selected and imported automatically.
Differences between Importing as Area or Layer
If you import the sheet as area, a new node ![]() is created in the project structure view. You can move an area within the project structure view by simply dragging and dropping the area to the position you want.
is created in the project structure view. You can move an area within the project structure view by simply dragging and dropping the area to the position you want.
In the Layers form, the new area is also displayed.
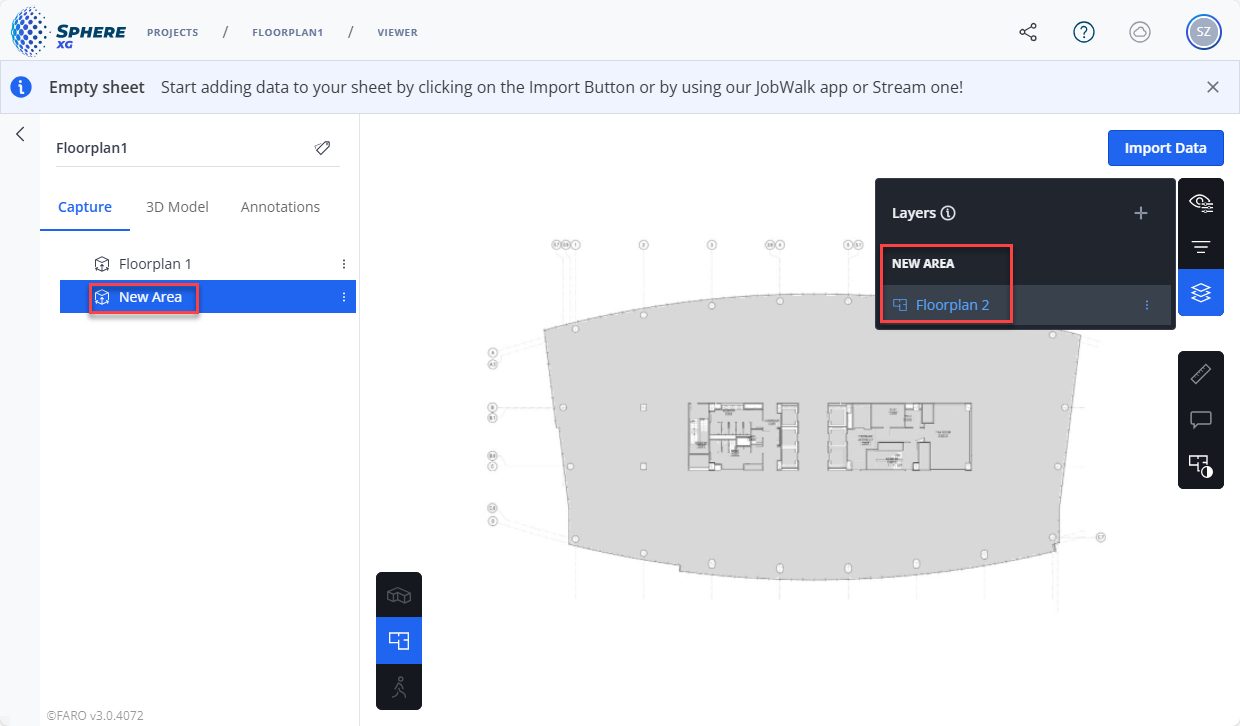
Figure 1-119 Imported sheet as a new area
If you import the sheet as layer, the sheet is added to the current area of the project, i.e. under the node of the current area. In the Layers form, the imported sheet is displayed as layer. The functionality is the same as described in Add, Edit or Delete Layers in Existing Projects.
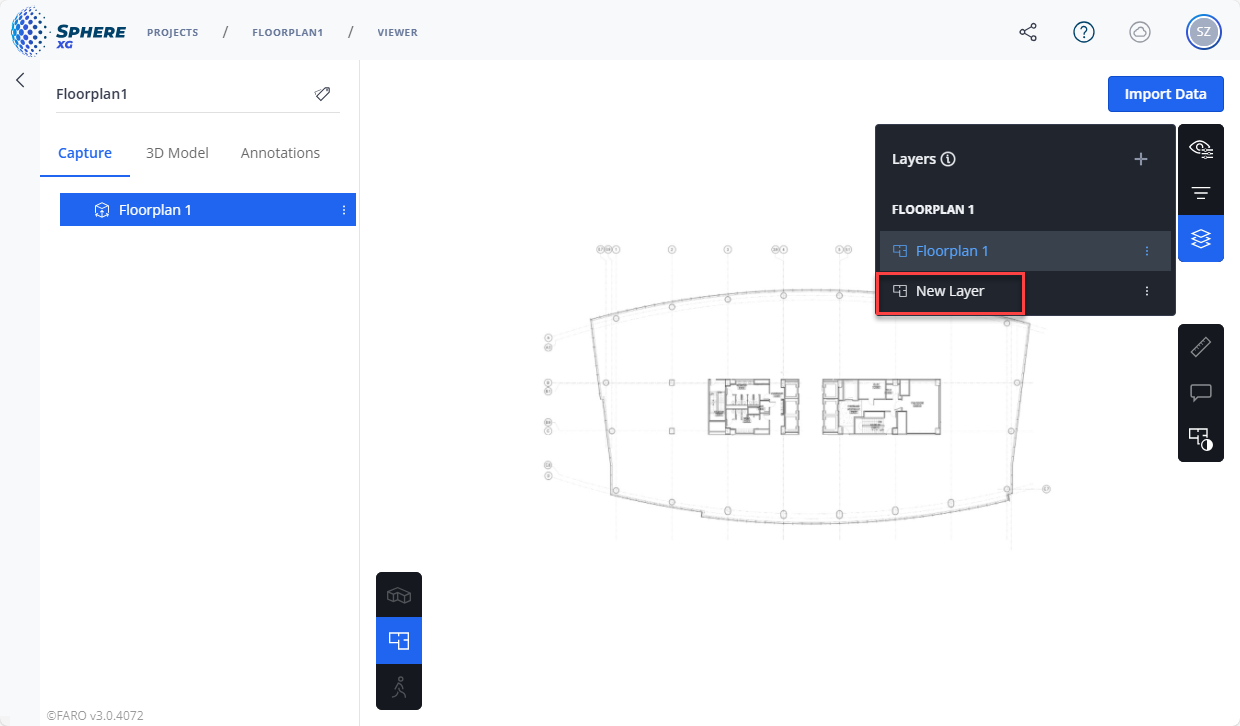
Figure 1-120 Imported sheet as a new layer
If you add a sheet as a new layer, the alignment page is opened automatically, see Align Layers.
