 Members: Teams Tab
|
1238888 |
Depending on your role you may not be able to see this task panel entry or edit properties. For further information, see Roles and Permissions in Sphere XG.
On this tab you can create teams containing users and add them to the currently selected workspace. You can add users who are already members of the workspace or invite new users.
See also Common Features in the Dashboard Tables for more information on the general table structure and content.
-
Click the task panel entry Members.
-
Then click the Teams tab.
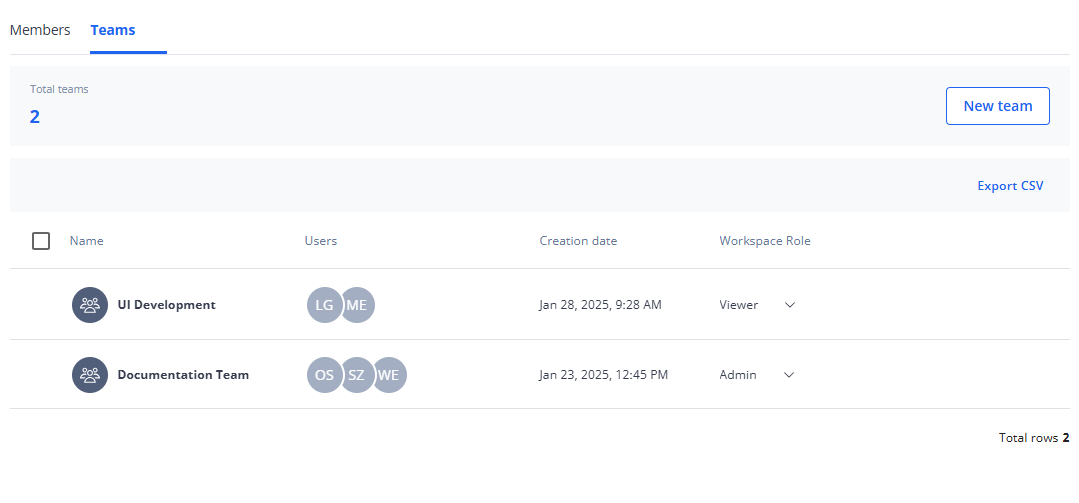
Figure 1-24 Teams as workspace members
New team: Opens a dialog in which you can create a new team, invite it to the workspace and assign a workspace role.
Teams Summary
Displays the number of teams in the workspace.
List of Teams
The Members page shows the list of teams who are members of the currently active workspace with name, user icons, creation date and the team's workspace role.
You can change the workspace role by opening the dropdown list in column Workspace Role and selecting the role you want.
Hovering the mouse pointer over a team, displays the following options:
View details: same as clicking on the team to open the team details, see section Team Details below.
![]() Selects the team. To select all teams, mark the checkbox at the top of the list.
Selects the team. To select all teams, mark the checkbox at the top of the list.
You can customize the table as explained in Customize Tables. Clicking on the ![]() icon opens a menu from which you can select the following options:
icon opens a menu from which you can select the following options:
View details: See below under Team Details.
Change Role: Opens a dropdown list from which you can select a new project role for the selected team(s).
Remove team: Removes the team and its team members from the workspace. Note that you cannot undo this. If you want to re-add the team, you must create it again. The users who were members of the team no longer have access to the workspace, but their accounts still exist.
Team Details
Click a team to open the team details with the (team) Members and the Groups&Projects tabs:

Figure 1-25 Team details
(Team) Members Tab
The information on this tab is similar to the Members page. It shows the members of the team.
Invite members: Opens a dialog in which you can add users to the team.
The (team) members summary shows the team name and the workspace role assigned to the team. Clicking on the name allows you to change the name. You assign the workspace role to the team at the team creation but you can also change it later on the Teams tab in column workspace.
Users who are members of the team may also have a workspace role assigned directly to them. In this case, the role with the highest permission level takes precedence.
