Capture Tab: Walk Mode
|
1238888 |
This view allows you to move ("walk") through 360° photos, point clouds, Flash scans and 3D models.
There are two ways to access the walk mode view:
-
Click icon
 in the toolbar on the lower left side.
 -
In the 2D view or 3D view, click a waypoint (blue dots) or a Flash scan or 360° photo (blue and white dots).
The walk mode view is opened.
To move in the walk mode view, you can:
-
Pan left, right, up and down with the left mouse button.
-
Zoom in and out with the mouse wheel.
-
Click the next waypoint, a Flash scan or a 360° photo. If a 360° photo has orientation information, you can click anywhere in the walk mode view. The view will change to the closest waypoint.
|
|
|
|
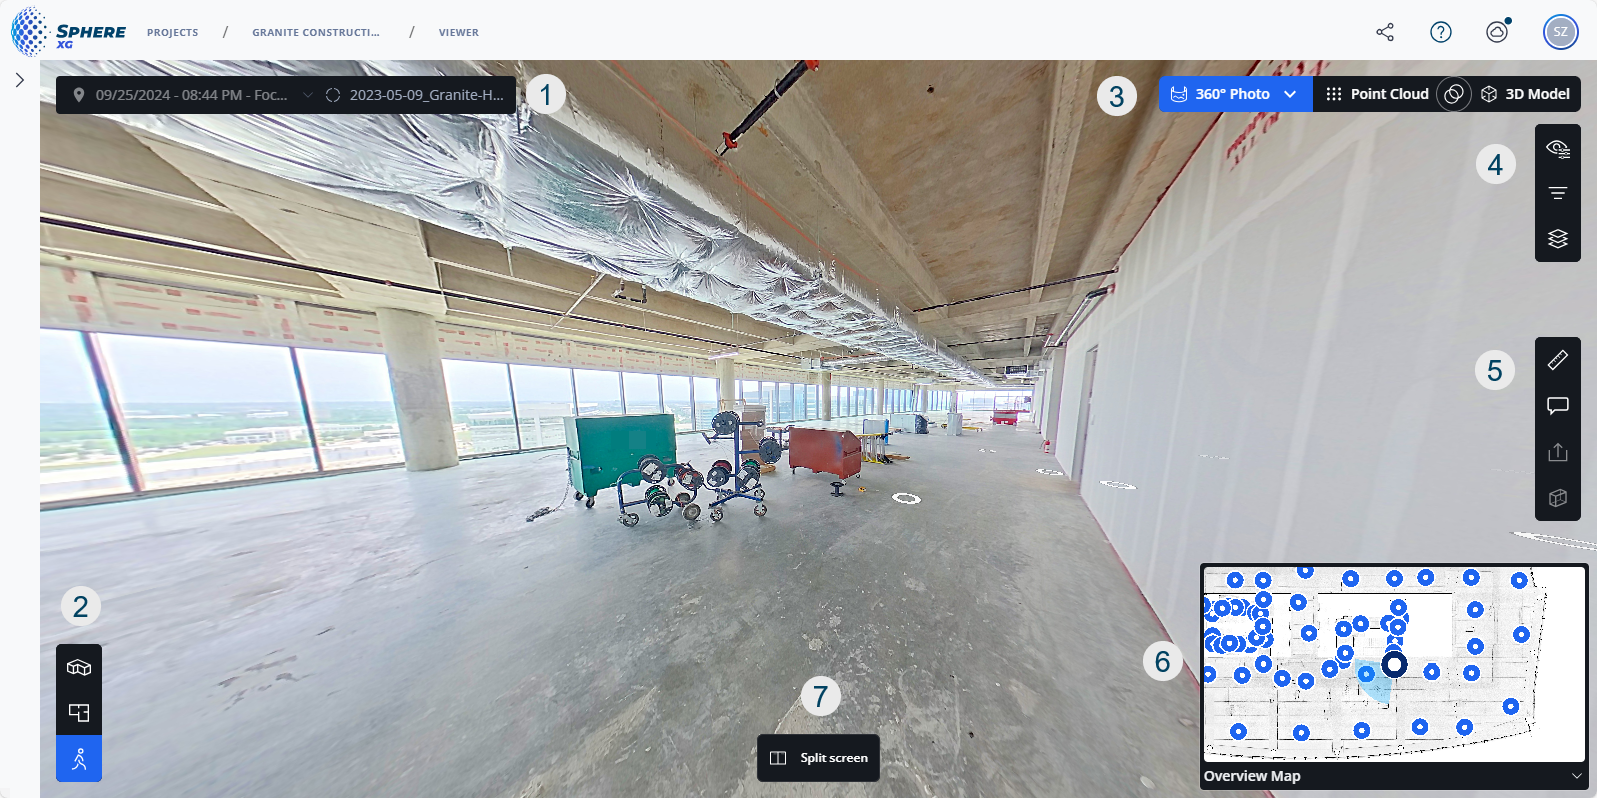
Figure 1-46 Walk mode view |
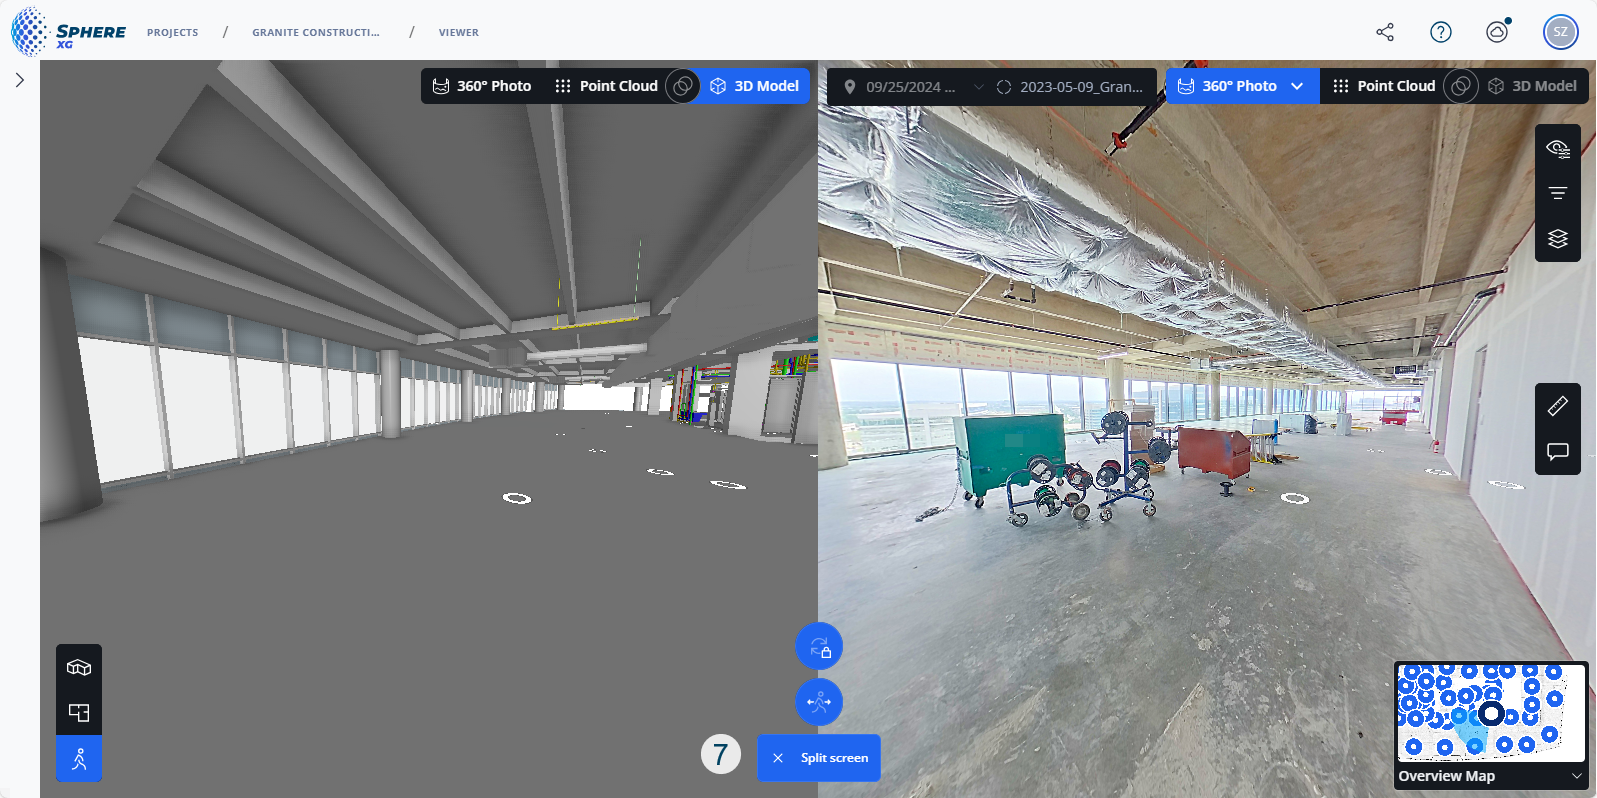
Figure 1-47 Walk mode split view |
If a 360° photo has orientation information, you can copy the coordinates of a location in the 360° photo to the clipboard. Right-click it in the walk mode view, then select the coordinates entry. You can also place a pin to mark a location and its coordinates. See Get and Mark the Coordinates of a Location for more information.
 Breadcrumbs and toggle Live/Draft
-
The breadcrumbs show you where you are in the project. Clicking a breadcrumb opens the corresponding page.
-
With the Live/Draft toggle, you can change between the draft view page and the published (live) project. You can also open the Draft view by clicking the Edit scans button, see below. If you are looking at a project that is currently being published, the toggle is marked with a red indicator dot.
 Time travel: If there are more than one point clouds, Flash scans or 360° photos in the project, you can select these elements from the dropdown list to "go through time", i.e. see the status of a project at various points in time. For more information on the time travel feature, see Time travel Through your Project.
In addition, this field shows the dataset name, which is also shown in the project structure view, on the left side and the scan name as well as the capture date on the right side. This dropdown also contains other data sets showing the scene in a 1.5m radius around the currently active waypoint.
 Toggle View buttons:
-
Depending on the objects in your project, you can toggle the view between these objects by clicking the corresponding button. In the example above, you can toggle between the 360° photo, the point cloud and the 3D model. If images contain color and intensity information, you can open the dropdown 360° Photo and select the color option you want.
-
By clicking icon
 you can create an overlay between the point cloud and the 3D model.
 -
You can then vary the opacity of one or the other via the view-specific toolbar, i.e. clicking the
 icon and then reducing or increasing the opacity with the sliders. For further information, see also Make a Sheet Black and White.
 View Settings and Filter Toolbar

 Mini view: Shows a 2D view of your project.
-
The light blue triangle pointing away from the waypoint, Flash scan or 360° photo is your current perspective.
-
If you hover the mouse pointer over the mini view, the size is increased.
-
You can change to the full-screen view by clicking icon
 .
. -
You can hide the mini view by clicking icon
 .
.
 Split screen: If you click the
  button, the screen is divided vertically. You can now use the buttons described in point
  to display one object per side.
|
|
Lock orientation: Locks the two views regarding their orientation, i.e. if you turn around in one view, the other view will follow. |
|
|
Follow to selected waypoint: If you click a waypoint in one view to go to this waypoint, the other view will follow. |
